Customizing your WordPress theme is a fantastic way to make your website truly yours. Whether you’re just starting out or have a bit of WordPress experience under your belt, learning how to customize a WordPress theme is a game-changer.
In this guide, we’ll walk you through everything from using the super-easy Full Site Editor and Theme Customizer to more advanced methods like tweaking theme files and creating child themes.
Table of Contents
- Method 1: Customize Using the Full Site Editor
- Method 2: Customize Using the Theme Customizer
- Method 3: Customize Using a Page Builder
- Method 4: Customize Using the Theme File Editor
- Method 5: Customize Using a Child Theme
- Best Practices for Customizing WordPress Themes
- Easiest WordPress Themes to Customize
Customizing a WordPress theme can be done in various ways, depending on the type of theme you’re using and whether you prefer to work with or without a page builder. Here’s a concise guide to help you decide the best method for your needs:
- The Full Site Editor (FSE) is ideal for beginners using block-compatible themes. It allows you to edit your entire site visually without coding, requiring WordPress version 5.9 or higher. This method is straightforward and intuitive.
- The Theme Customizer is suitable for beginners to intermediate users working with classic themes or older WordPress versions. It provides real-time customization with an easy-to-use interface, perfect for making quick, visual changes without coding.
- Using a Page Builder is great for all user levels, offering extensive design options and flexibility. Page builders like Elementor and Beaver Builder allow you to create complex layouts with drag-and-drop functionality, making them ideal for users seeking more control without advanced skills.
- The Theme File Editor is for advanced users with coding knowledge. This method offers maximum control but comes with risks like losing changes after updates. It’s best for precise modifications using HTML, CSS, and PHP.
- Creating a Child Theme is for intermediate to advanced users wanting to make extensive customizations while preserving the original theme. A child theme inherits the parent theme’s style and functionality, allowing safe updates without losing customizations.
Having outlined the options, let’s explore each method step-by-step.
Method 1: How to Customize a WordPress Theme Using the Full Site Editor
The Full Site Editor (FSE) extends the ability to edit posts and pages through block editing. This is one of the simplest ways to customize WordPress themes, but it only works for certain themes that integrate this block-based site editor.
To use this method, ensure your WordPress version is 5.9 or higher and you have a block-compatible theme. The FSE allows you to edit your entire website using blocks and can be quickly accessed through the WordPress dashboard.
Here’s how you can customize your WordPress theme using the Full Site Editor:
- Log into your WordPress dashboard with your credentials.
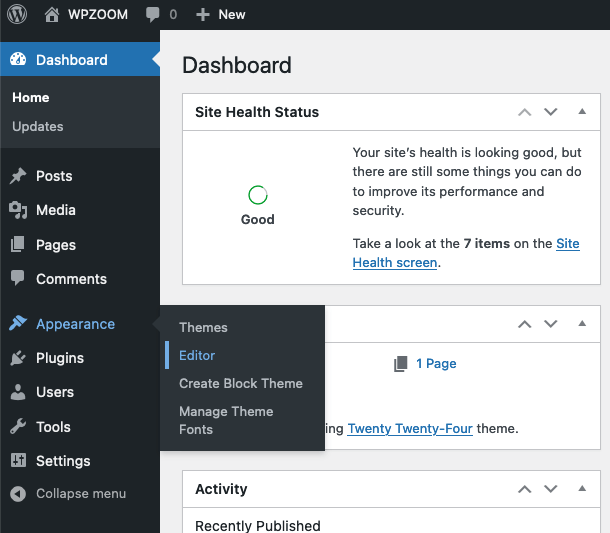
- Open the block editor interface by navigating to Appearance > Editor from the left-hand menu.
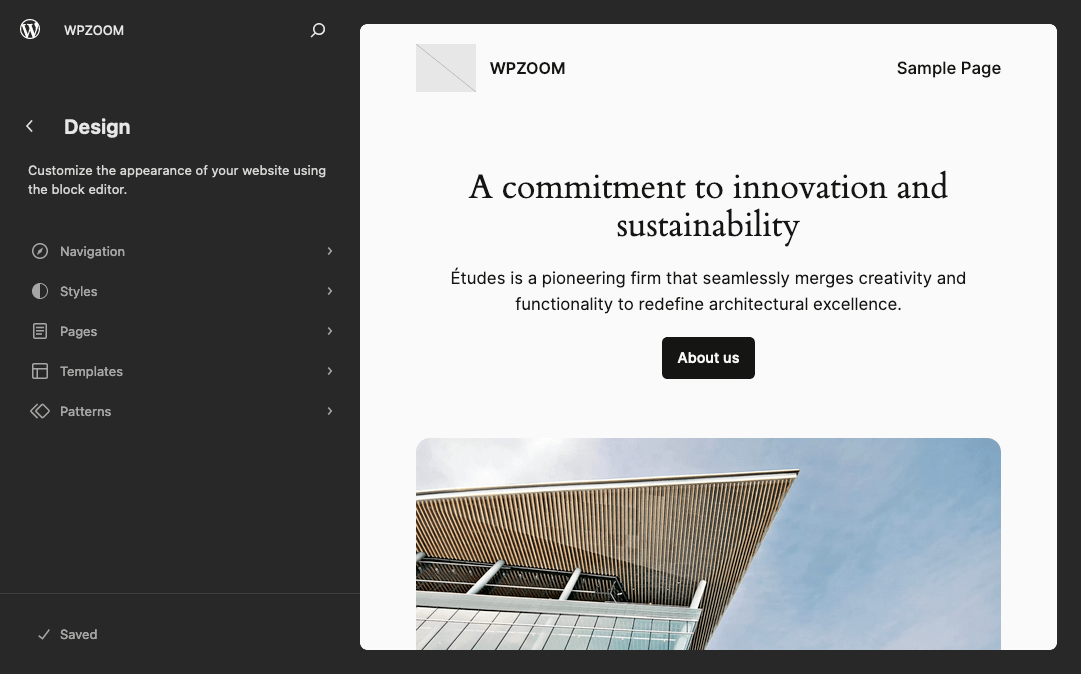
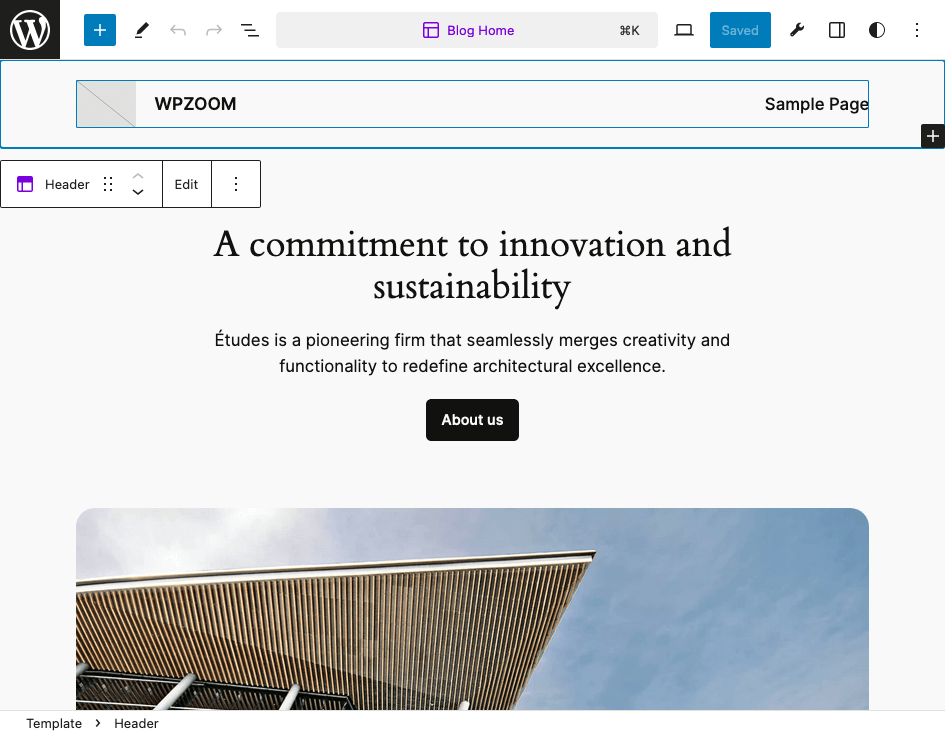
- Use the Block Editor: The block editor will now load, allowing you to change your website’s layout using blocks. Important parts of your pages are separated into modifiable block elements. You can add new blocks, delete old ones, or rearrange them to fit your design needs. Additionally, you’ll find shortcuts to other customization options like:
– Navigation: Modify your website’s navigation menus.
– Styles: Change colors, fonts, and other design elements.
– Pages: Edit the content and layout of individual pages.
– Templates: Customize the layout and structure of different page and post types.
– Patterns: Edit smaller design elements within your templates. - Add New Blocks or Patterns: Using the “+” sign in the upper-left corner, you can start adding new blocks or patterns. Utilize the drag-and-drop interface to position elements where you want them. You can choose from a variety of block types, including text, images, galleries, columns, and more.
- Customize Block Settings: Each block has its own settings, accessible by clicking on the block and adjusting the options in the right-hand sidebar. You can change things like alignment, color, typography, and more to fit your design vision.
- Use Reusable Blocks: If you have sections of your site that you want to use across multiple pages, you can create reusable blocks. This feature saves time and ensures consistency throughout your site.
- Preview Your Changes: Before finalizing your changes, use the preview function to see how your customizations will look on different devices, such as desktops, tablets, and mobile phones. This ensures your design is responsive and looks great on all screen sizes.
- Save Your Changes: Once you’re satisfied with your customizations, save your changes. Review your site to ensure everything looks and functions as expected.
This method is highly user-friendly and doesn’t require any coding experience, making it an excellent choice for those who want to personalize their WordPress theme with ease. As long as your theme is compatible and your WordPress version is up-to-date, the Full Site Editor is a powerful tool for theme customization.
Method 2: How to Edit a Theme in WordPress Using the Theme Customizer
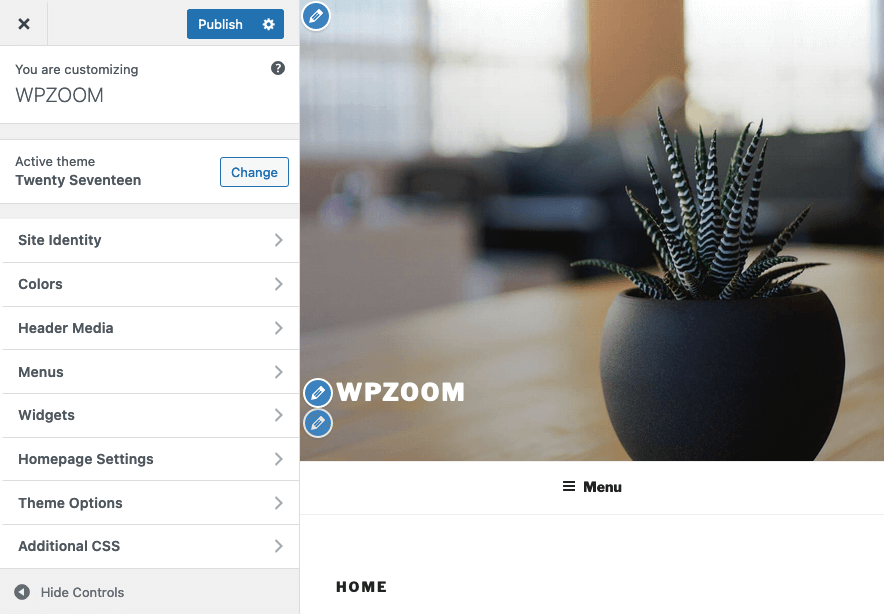
The Theme Customizer is another user-friendly method for customizing your WordPress theme, suitable for both beginners and intermediate users. This tool allows you to make changes to your theme in real-time, providing a visual representation of your modifications as you make them. The Theme Customizer is accessible directly from the WordPress dashboard and is ideal for classic themes or for those needing to keep their WordPress version below 5.9.
Here’s how you can customize your WordPress theme using the Theme Customizer:
- Log into your WordPress dashboard by logging in with your credentials.
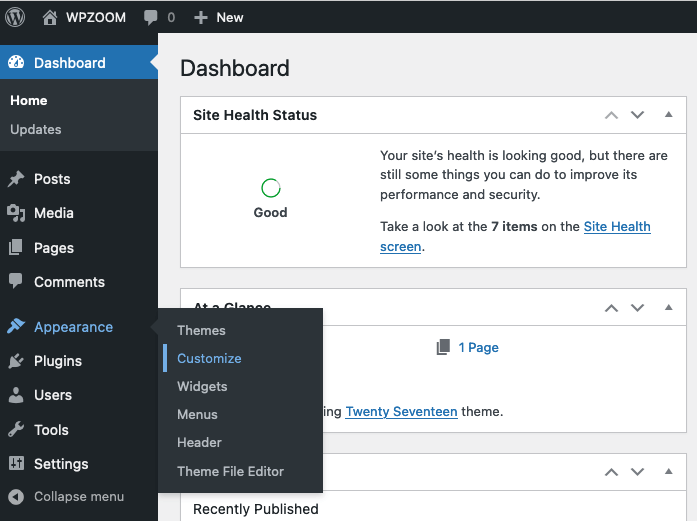
- Open the Theme Customizer interface by navigating to Appearance > Customize from the left-hand menu.
- Explore Customization Options: The Customize page will display a live preview of your site alongside a menu of customization options in the left sidebar. Depending on your theme, you might see options such as:
– Site Identity: Edit your site title, tagline, and logo.
– Colors: Adjust the color scheme of your theme, including background and text colors.
– Menus: Modify your site’s navigation menus.
– Widgets: Add and manage widgets for your site’s sidebar, footer, and other widget areas.
– Homepage Settings: Set your homepage to display a static page or your latest posts.
– Additional CSS: Add custom CSS for more advanced styling. - Make Real-Time Changes: Click on any section in the left sidebar to start customizing it. As you make changes, you’ll see them reflected in the live preview on the right. This real-time feedback helps you adjust your design until it looks just right.
- Preview Your Changes: Use the preview function to see how your customizations will appear on different devices, such as desktops, tablets, and mobile phones. This ensures your site is responsive and looks good on all screen sizes.
- Save & Publish: Once you’re satisfied with your changes, click the Publish button at the top of the sidebar to save and apply your customizations to your live site. If you’re not ready to publish, you can save your changes as a draft or schedule them to go live at a later time.
The Theme Customizer is an intuitive and powerful tool that doesn’t require any coding knowledge, making it perfect for users who want to personalize their WordPress theme quickly and easily. While it may not offer the same level of control as more advanced methods, it provides ample customization options for most users’ needs.
Method 3: Use a Page Builder for WordPress Theme Customization
Page builders are powerful tools that offer extensive customization options for WordPress themes, making them suitable for users of all levels. These plugins provide a drag-and-drop interface, allowing you to create complex layouts and designs without any coding knowledge. Popular page builders include Elementor, Beaver Builder, WPBakery Page Builder, and Divi Builder.
One thing that you should always keep in mind when considering using a page builder plugin is that you need to be certain of your decision. Once you start designing your WordPress website with a page builder plugin you need to stick to it.
That’s because if you decide all of a sudden to stop using it, all your customizations will be lost. Everything you customized in the past will need to be redone, and chances are you will need to put quite a lot of time and effort into recreating everything.
Most of these plugins work in a similar fashion, and while there are differences in the way you can use them to edit your theme, there are a handful of similarities as well.
Here’s how you can customize your WordPress theme using the Elementor page builder:
- Install and activate Elementor.
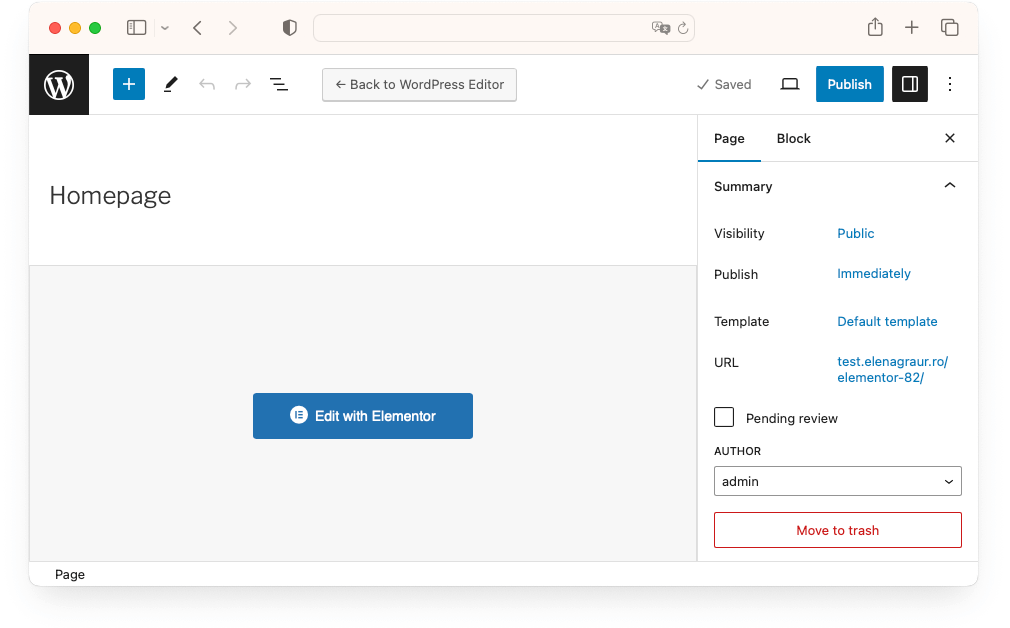
- Edit a Page: Navigate to the page or post you want to customize. Click the Edit with Elementor option to edit with the page builder.
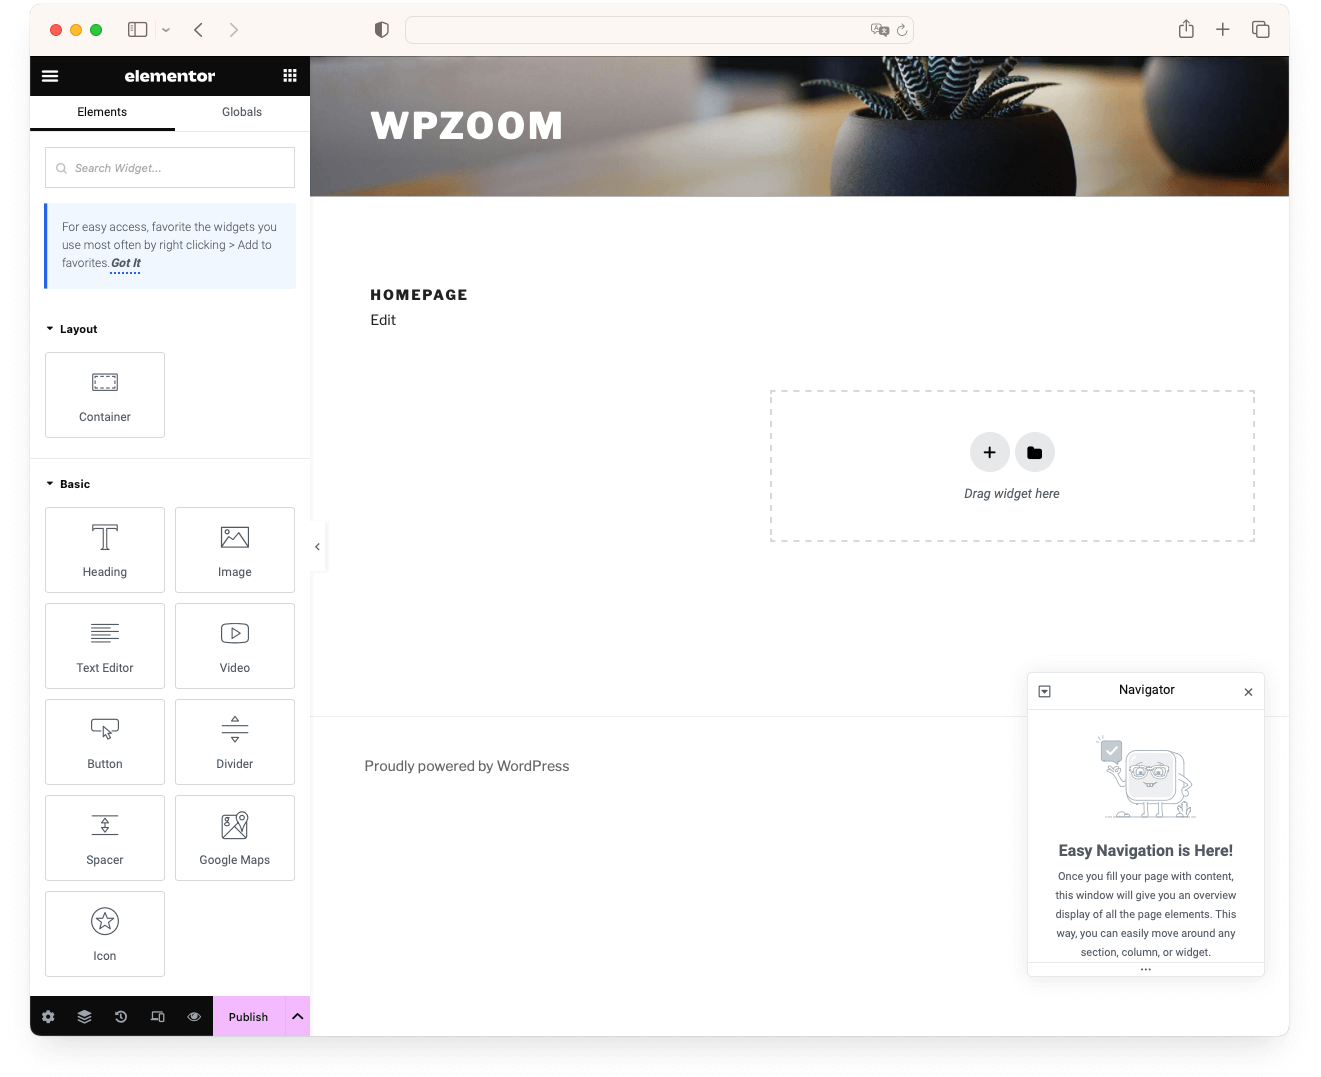
- Use the Drag-and-Drop Interface: The page builder interface will load, allowing you to drag and drop various elements onto your page.
Common elements include:
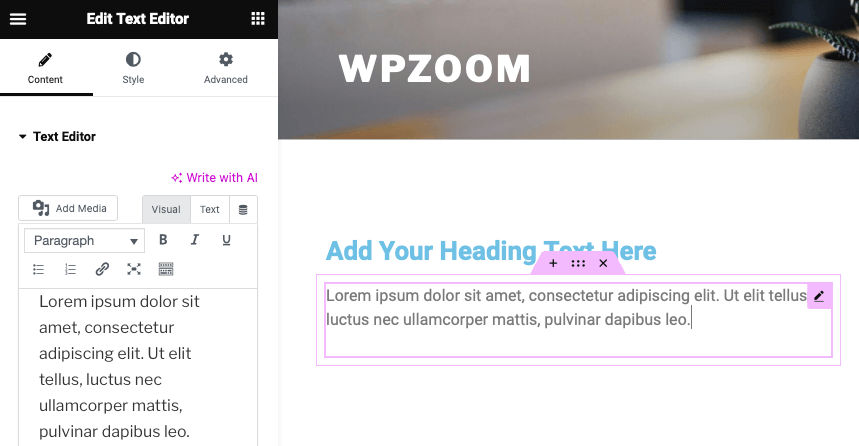
– Text Blocks: Add and style text content.
– Images and Galleries: Insert images and create image galleries.
– Buttons and Call-to-Actions: Add interactive buttons and CTAs.
– Columns and Rows: Organize content into structured layouts.
– Widgets and Add-ons: Utilize various widgets like contact forms, sliders, and social media icons. - Customize Element Settings: Click on any element to open its settings panel. Here, you can adjust properties such as alignment, colors, typography, margins, and padding. Each element may have unique settings, providing you with detailed control over its appearance.
- Preview Your Changes: Use the preview function to see how your customizations will look on different devices. This ensures your design is responsive and user-friendly across all screen sizes.
- Save and Publish: Once you’re satisfied with your design, save your changes. You can publish the page immediately or save it as a draft to continue editing later.
Page builders offer unparalleled flexibility and design capabilities, making them a great choice for users who want to create visually appealing and highly customized WordPress sites without needing to write code. They provide a vast array of templates and widgets, allowing you to build professional-looking pages with ease.
Method 4: How to Customize a Theme in WordPress Using the Theme File Editor
The Theme File Editor is a powerful tool for advanced users who have coding knowledge and want to make precise modifications to their WordPress theme. This method provides maximum control over the theme’s appearance and functionality, allowing you to edit the theme’s underlying code directly. However, it comes with potential risks, such as losing changes after theme updates.
Here’s how to customize your WordPress theme using the Theme File Editor:
- Log into Your WordPress Dashboard by logging in with your credentials.
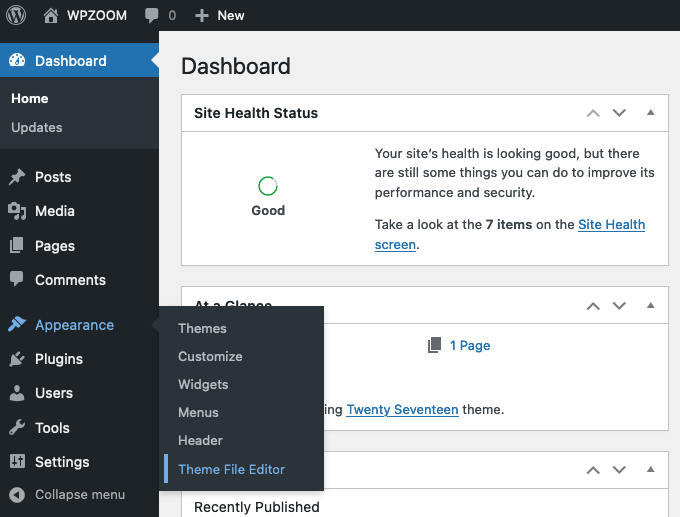
- Navigate to Appearance > Theme File Editor. You may see a warning message about editing theme files directly, which highlights the importance of making a backup before proceeding.
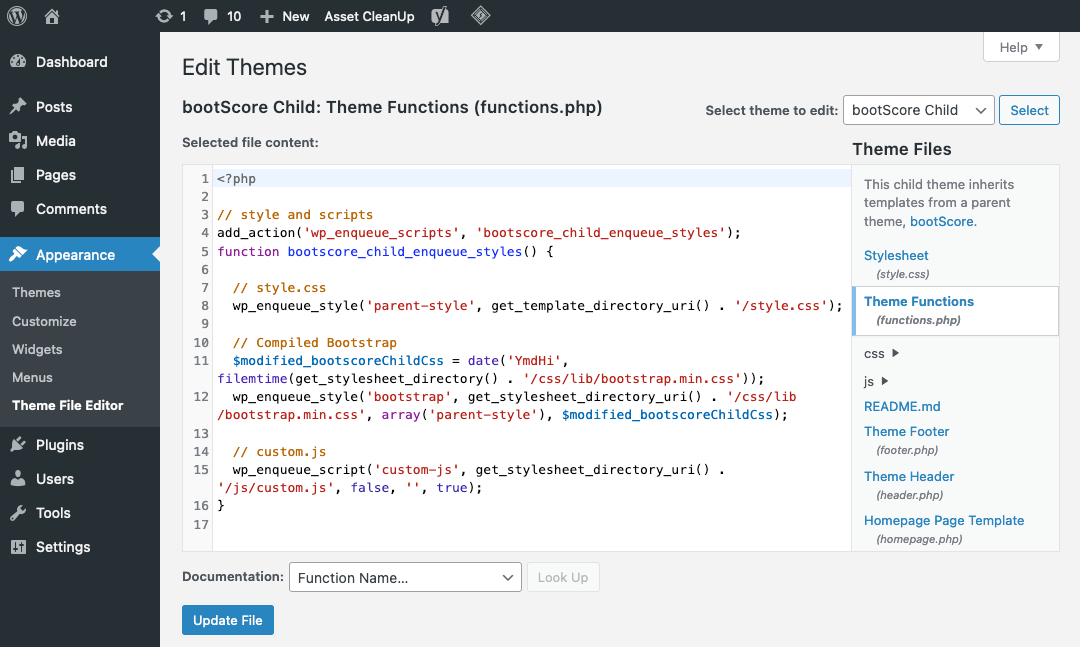
- Select the File to Edit: On the right side of the editor, you’ll see a list of files that make up your theme.
Click on the file you want to edit to open it in the editor. Here, you can add or modify HTML, CSS, PHP, and JavaScript code. Ensure you have a good understanding of coding practices, as mistakes can break your site.
Common files you might want to edit include:
– style.css: Controls the visual styles of your theme.
– functions.php: Allows you to add or change theme functionalities.
– header.php, footer.php, single.php, page.php: Theme template files that define the structure of different parts of your theme. - Save Your Changes: After making your modifications, click the Update File button to save your changes. It’s a good idea to test your site immediately to ensure everything is working as expected.
- Use a Child Theme for Major Changes: To prevent losing your customizations when the theme is updated, consider making major changes in a child theme. This method ensures that your custom code is preserved even when the parent theme is updated.
Even though this method does provide some important advantages, there are some risks you need to be aware of. There are two reasons why you should actually avoid using this method altogether.
- All the changes you make through this method will be lost the next time you update the theme. If you don’t update the theme, you risk leaving your website exposed to security threats. If you do update it, all your changes will be lost and will need to be redone each time.
- You can end up ruining your website. That is because changes made in the code through this method are not tracked, and you will not have access to the previous versions of the files you edit.
So, how to customize a theme in WordPress with maximum flexibility and minimum risk?
Method 5: Customizing WordPress Themes Using a Child Theme
Creating a child theme is one of the most powerful and safest methods to customize a WordPress theme. A child theme is essentially a duplicate of the original (parent) theme, which allows you to make extensive customizations without affecting the parent theme. This ensures that your changes are preserved even when the parent theme is updated.
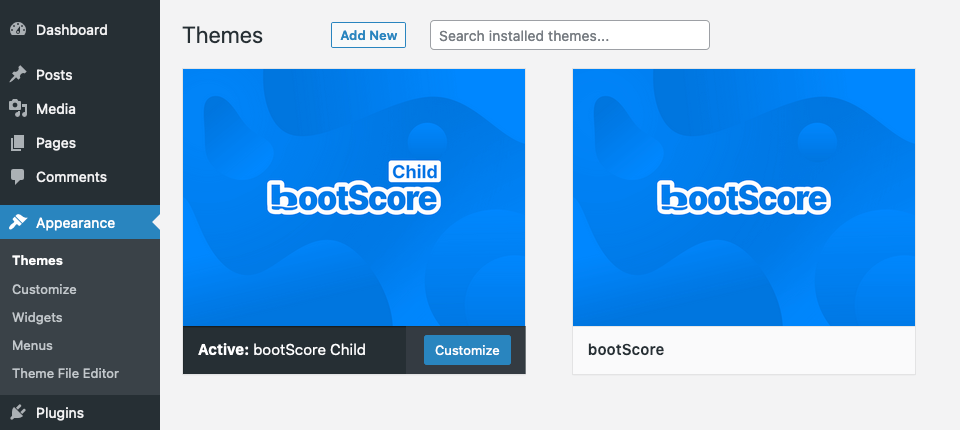
Here’s how to customize your WordPress theme using a child theme:
- Create your child theme by following our tutorial on creating a child theme.
- Install your child theme from your WordPress dashboard.
- Customize the theme, using any of the methods already described in this guide.
- Once the changes are made, save them.
- Activate the theme and check to see if your website looks and functions the way you were expecting.
Using a child theme is an excellent approach for users with intermediate to advanced skills who want to make significant customizations while maintaining the integrity of the parent theme.
Best Practices for Customizing WordPress Themes
Customizing your WordPress theme can significantly enhance the look and functionality of your website. To ensure a smooth and effective customization process, follow these best practices:
- Backup Your Site: Before making any changes, always create a full backup of your site. This ensures you can restore your site if anything goes wrong during the customization process.
- Use a Child Theme: For extensive customizations, create and use a child theme. This allows you to modify the WordPress theme code without affecting the original files, preserving your changes even after theme updates.
- Use a Local Development or Staging Site: Set up a local development environment on your computer or a staging site that mirrors your live site. This allows you to safely test and develop customizations without affecting your live site.
- Use Version Control: Implement version control (e.g., Git) to track changes and collaborate more effectively. This helps you manage your codebase, roll back to previous versions if needed, and maintain an organized workflow.
- Test on Multiple Devices: Ensure your customizations look good and function properly on different devices and screen sizes. Use the preview feature in WordPress or online tools to check responsiveness.
- Follow Best Coding Practices: If you’re adding custom code, adhere to WordPress coding standards. This ensures your code is clean, efficient, and compatible with future updates.
By following these best practices, you can customize your WordPress theme effectively, ensuring a visually appealing, functional, and secure website.
Easiest WordPress Themes to Customize
WordPress themes vary widely in terms of customizability. Here are some of the best and most easily customizable WordPress themes:
- Inspiro PRO: Perfect for professional portfolios, Inspiro PRO is built around the Elementor page builder, offering a variety of layout options and dynamic elements. It’s user-friendly, making customization straightforward and seamless.
- UniBlock PRO: Based on the Full Site Editor, UniBlock PRO is highly customizable without any coding required. Ideal for those looking to leverage the latest WordPress functionality for easy theme editing.
- Anchor: Seamlessly integrates with WooCommerce and the Full Site Editor, Anchor allows for extensive customization without technical knowledge. It’s perfect for creating a unique and professional e-commerce site.
These themes are designed to provide maximum flexibility and ease of use, making them excellent choices for anyone looking to customize their WordPress site efficiently.
