Learning how to install a WordPress theme is a fundamental skill for anyone looking to create or manage a WordPress website.
We’ll walk you through three main methods: installing through the WordPress theme directory, uploading from a .zip file, and using FTP for manual installation. By mastering these techniques, you’ll have the knowledge to choose the best method for your needs and customize your site with ease.
Table of Contents
- How to Install a WordPress Theme Through the Theme Directory
- How to Upload a Theme to WordPress
- How to Install a Theme on WordPress Manually Using FTP
Each method comes with its own pros and cons. Let’s explore these methods in detail to help you find the best fit for your needs.
How to Install a WordPress Theme Through the Theme Directory
Installing a WordPress theme directly from the theme directory is often the simplest and most accessible option, especially for beginners. This method provides a user-friendly experience with a wide selection of free themes that meet WordPress’s quality and security standards.
Here’s a detailed guide on how to do it:
- Navigate to your WordPress site and log in to your WordPress Dashboard using your credentials
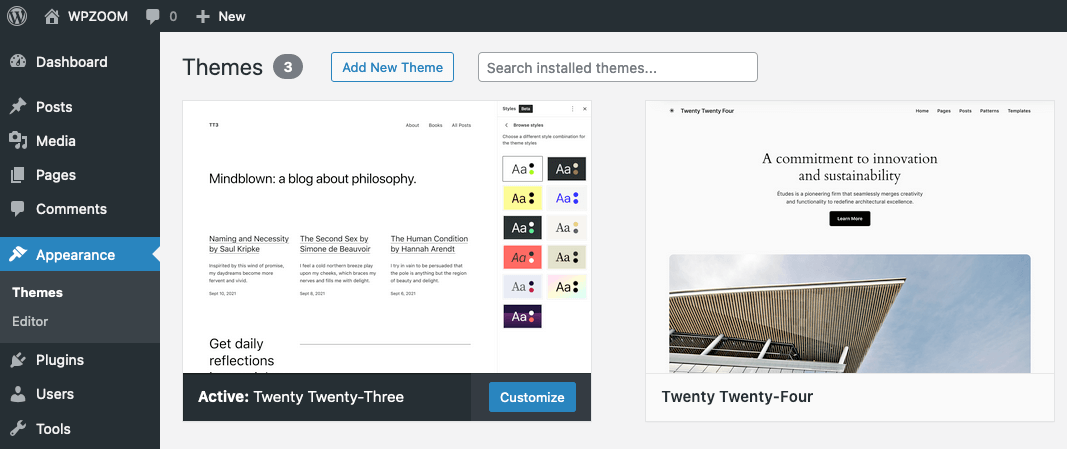
- In the left-hand menu, navigate to Appearance > Themes. On the Themes page you can see the current theme and available options.
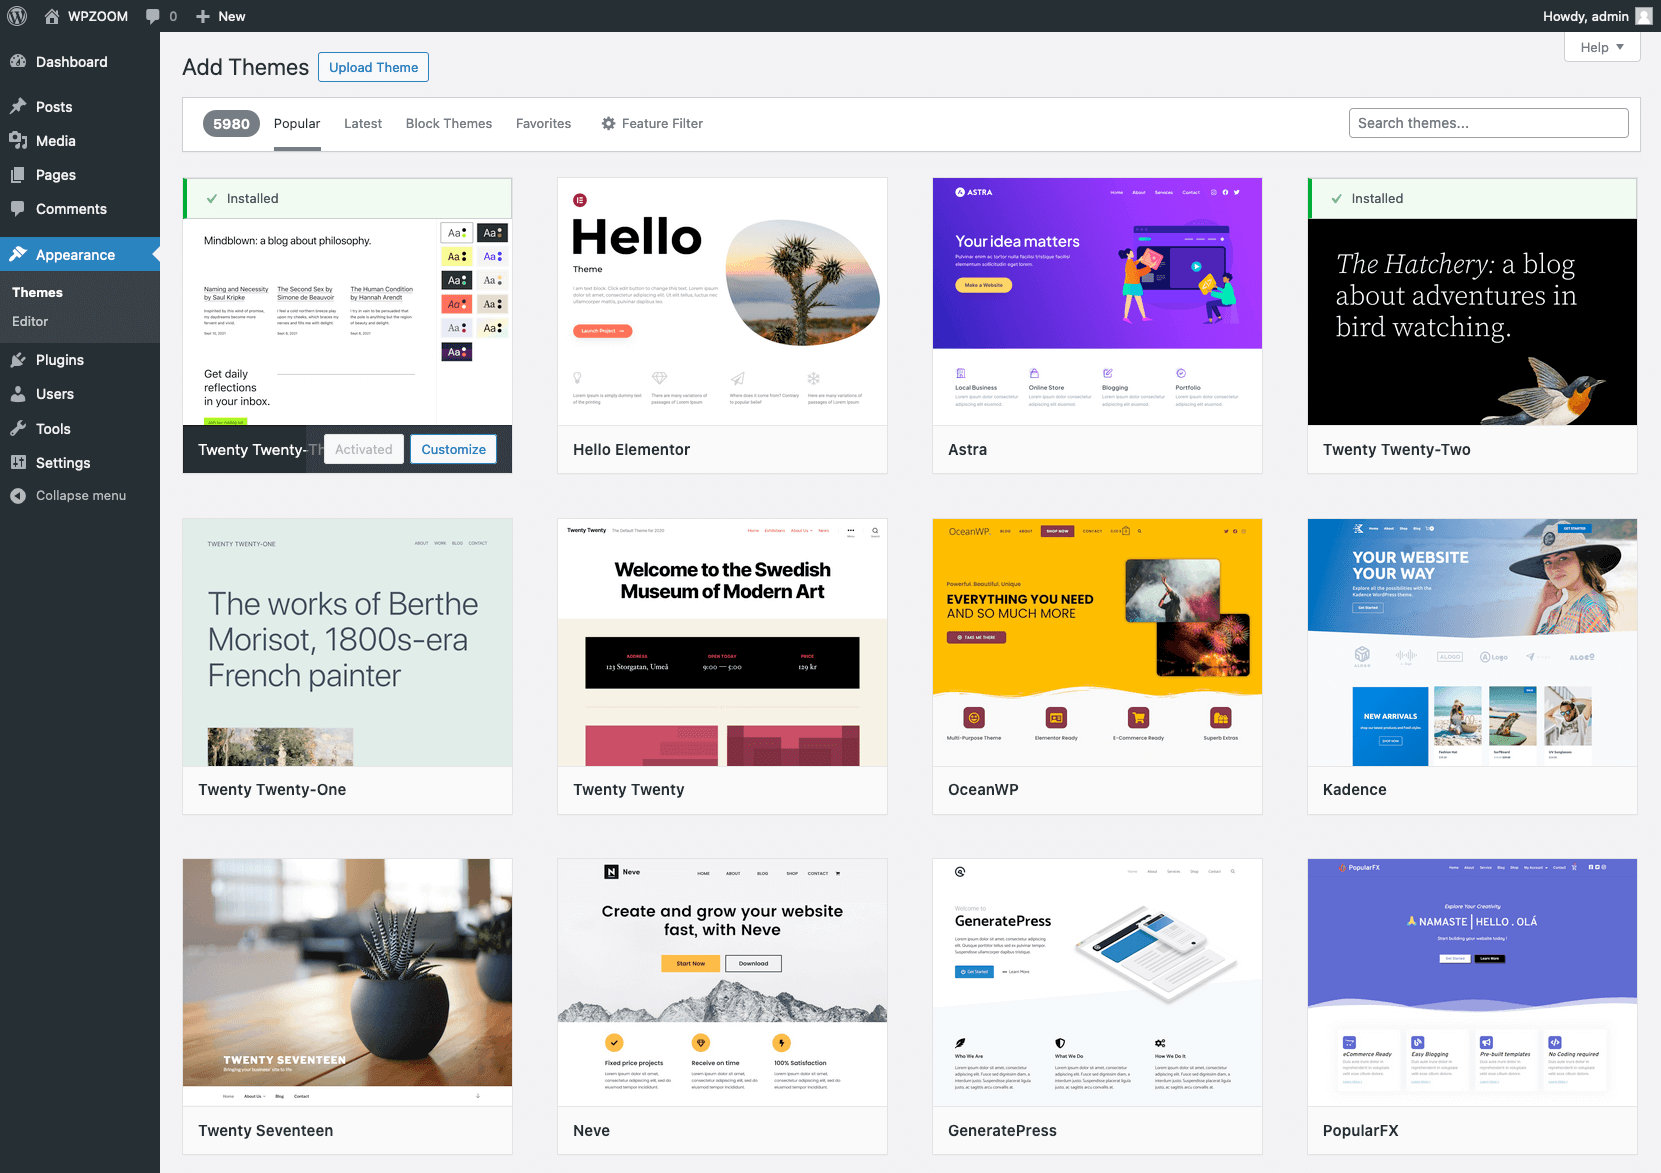
- At the top of the page, click the Add New button. This will redirect you to the WordPress theme directory, where you can browse a vast selection of themes.
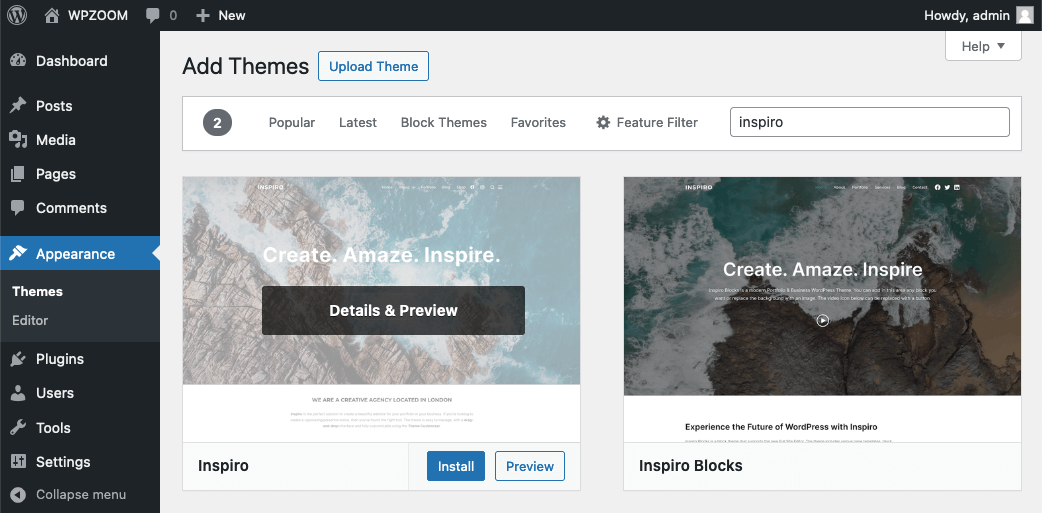
- Use the search bar to find themes by name or keyword. You can also use the feature filters to narrow down themes by layout, features, and subject.
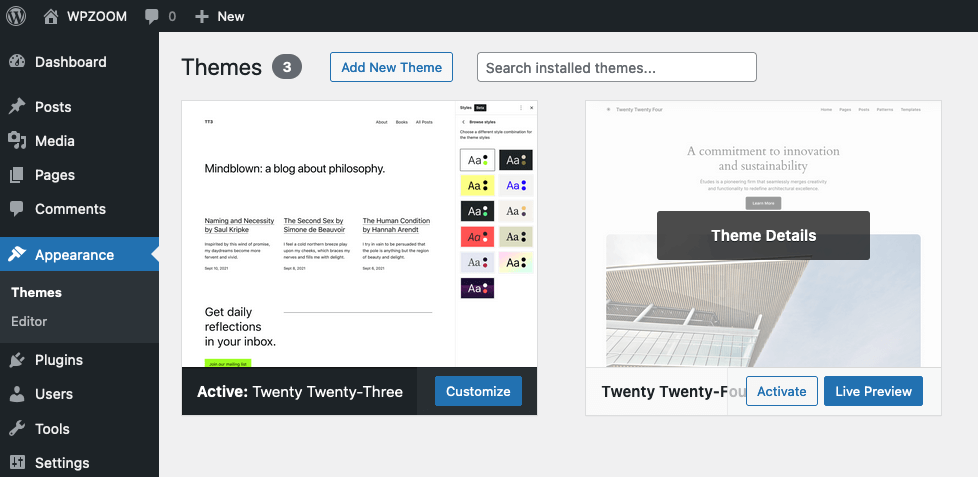
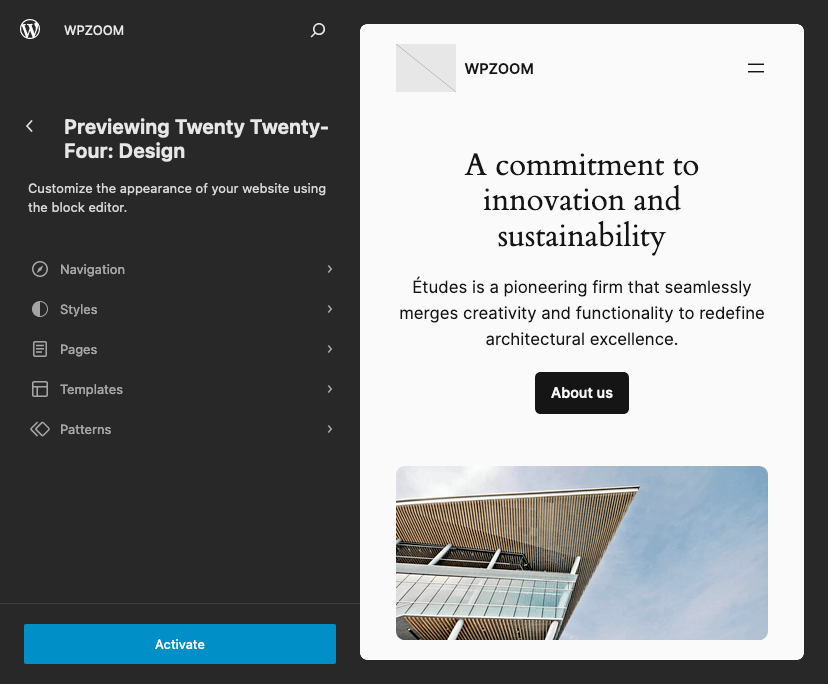
- Hover over the theme you are interested in and click Preview to see a live demo of how it will look on your site. This step helps ensure the theme matches your vision before installation.
- Once you find a theme you like, hover over it and click the Install button. WordPress will download and install the theme for you. This process may take a few moments.
- After the theme is installed, an Activate button will appear. Click this to apply the theme to your site. Activating the theme will change your site’s appearance immediately.
- After activation, you will be redirected to the WordPress Customizer. Here, you can make preliminary customizations like changing colors, fonts, and layouts. The Live Preview feature allows you to see changes in real-time before saving them.
Depending on the theme, you may have various customization options like header images, background colors, and more. Many themes come with documentation or guides to help you make the most of their features. - Visit your site to ensure the theme looks and functions as expected. Browse through different pages and posts to see how the new theme displays your content.
Benefits of Using the WordPress Theme Directory
- User-Friendly: The installation process is straightforward and suitable for users of all levels.
- Quality Assurance: Themes in the directory meet WordPress’s quality and security standards, ensuring they are safe to use.
- Free Options: Many themes are free, with premium upgrade options available for more features and customization.
- Support and Community: Popular themes often have strong community support, including forums and documentation, to help you troubleshoot and customize.
How to Upload a Theme to WordPress
If the free themes available in the WordPress theme directory don’t meet your needs in terms of design or functionality, you might want to consider uploading a premium or custom theme. This method is ideal for users who have purchased a premium theme from a third-party site like WPZOOM or have a custom theme developed specifically for their website.
Here’s how to do it:
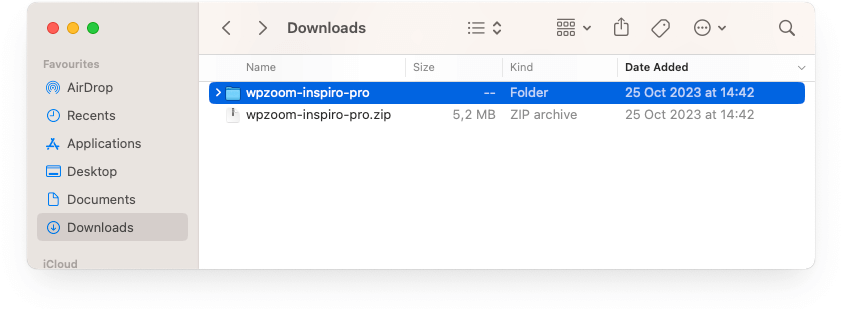
- When you purchase a premium theme, you will receive a zip archive containing all the theme files. Download this zip file to your computer.
- Navigate to your WordPress site and log in to your WordPress Dashboard using your credentials.
- Navigate to Appearance > Themes.
- At the top of the Themes page, click the Add New button.
- Instead of browsing the theme directory, click the Upload Theme button at the top of the page. This will open a new section where you can upload your theme.
- Click the Choose File button and navigate to the location on your computer where the theme zip file is saved. Select the file and click Open.
- Once the file is selected, click Install Now. WordPress will upload and install the theme for you. This process may take a few moments, depending on your internet connection.
- After the theme is installed, you will see a success message along with the option to activate the theme. Click Activate to apply the theme to your site.
- After activation, you can start customizing your theme. Go to Appearance > Customize to access the WordPress Customizer, where you can make changes to the design and layout of your site.
- Visit your site to ensure the theme looks and functions as expected. Browse through different pages and posts to see how the new theme displays your content.
Benefits of Installing a Theme from a Zip File
- Flexibility: You can use any theme, including those purchased from third-party developers or custom-built for your site.
- Unique Designs: Premium and custom themes often offer more unique and advanced designs compared to free themes.
- Enhanced Features: Premium themes usually come with additional features and customization options, providing greater control over your site’s appearance and functionality.
- Dedicated Support: Most premium themes include support from the theme developer, helping you resolve any issues that may arise.
How to Install a Theme on WordPress Manually Using FTP
For users with more technical knowledge or those dealing with larger theme files, installing a WordPress theme manually via FTP is a reliable option. This method requires using an FTP client to transfer files directly to your web server, providing greater control over the installation process.
Here’s a detailed guide on how to do it:
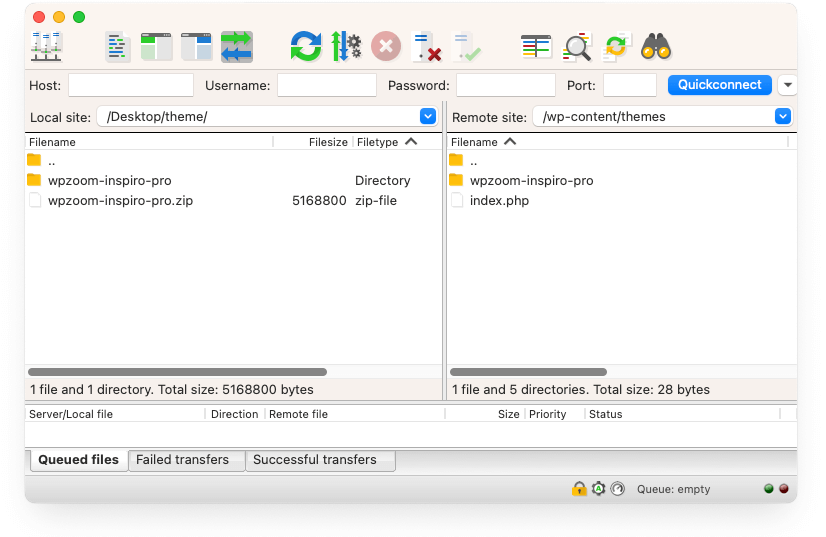
- You will need an FTP client, such as FileZilla. Download and install the FTP client if you haven’t already.
- Locate the downloaded theme zip file on your computer and unzip it. This will create a folder containing all the theme files.
- Open your FTP client and connect to your web server using the FTP credentials provided by your hosting provider. These credentials typically include the hostname, username, password, and port number.
- In the FTP client, navigate to the root directory of your WordPress installation. This directory is often named public_html, www, or after your website’s name.
Within the root directory, go to /wp-content/themes/. This is where all your current themes are stored. - On your computer, locate the unzipped theme folder. Drag and drop this folder into the /themes/ directory in your FTP client. The FTP client will begin uploading the theme files to your web server. This process may take a few minutes depending on the size of the theme and your internet speed.
- Once the upload is complete, log in to your WordPress Dashboard.
Navigate to Appearance > Themes. You should see the newly uploaded theme listed among your available themes.
Hover over the new theme and click Activate to apply it to your site. - After activation, you can start customizing your theme. Go to Appearance > Customize to access the WordPress Customizer, where you can make changes to the design and layout of your site.
- Visit your site to ensure the theme looks and functions as expected. Browse through different pages and posts to see how the new theme displays your content.
Benefits of Installing a WordPress Theme Manually Using FTP
- Greater Control: Manual theme installation via FTP gives you complete control over the theme files and their placement on your server.
- No File Size Limits: This method bypasses any file size limits imposed by the WordPress Dashboard upload feature.
- Useful for Large Themes: Larger themes or those with complex structures can be more reliably installed via FTP.
Bottom Line
Mastering how to install a WordPress theme is a crucial step in creating a professional and attractive website. To continue your WordPress journey, check out these additional resources from our blog:
- How to Choose a WordPress Theme: Discover tips and strategies for selecting the perfect theme that matches your site’s purpose and aesthetic.
- How to Customize Your WordPress Theme: Learn how to make your theme uniquely yours with customization options and tools.
- How to Update a WordPress Theme Without Losing Customization: Ensure your site stays up-to-date and secure while retaining all your custom tweaks and settings.
- How to Create a Custom Theme in WordPress: For the advanced user, delve into creating a custom theme from scratch to perfectly fit your vision.
- How to Delete a WordPress Theme: Keep your site clean and efficient by learning how to safely remove unused themes.
By exploring these topics, you’ll gain comprehensive knowledge to manage, customize, and optimize your WordPress site effectively.
