The WordPress Dashboard is where everything on your website comes together. It’s your go-to spot for creating content, managing your site, and customizing its appearance. But with so many options and features, getting familiar with the Dashboard can feel a bit like stepping into a new world.
No worries, though. This guide is here to make that experience smooth and enjoyable. We’ll walk through each aspect of the WordPress Dashboard, offering tips and insights along the way. By the time you’re done, you’ll have a solid understanding of how to navigate and use this powerful tool to bring your ideas to life.
Table of Contents
- How to Access the WordPress Admin Dashboard
- How to Customize the WordPress Dashboard
- How to Use the WordPress Dashboard
How to Access the WordPress Admin Dashboard
Accessing the WordPress Admin Dashboard is the first step to managing your website. Luckily, it’s straightforward and only takes a few seconds.
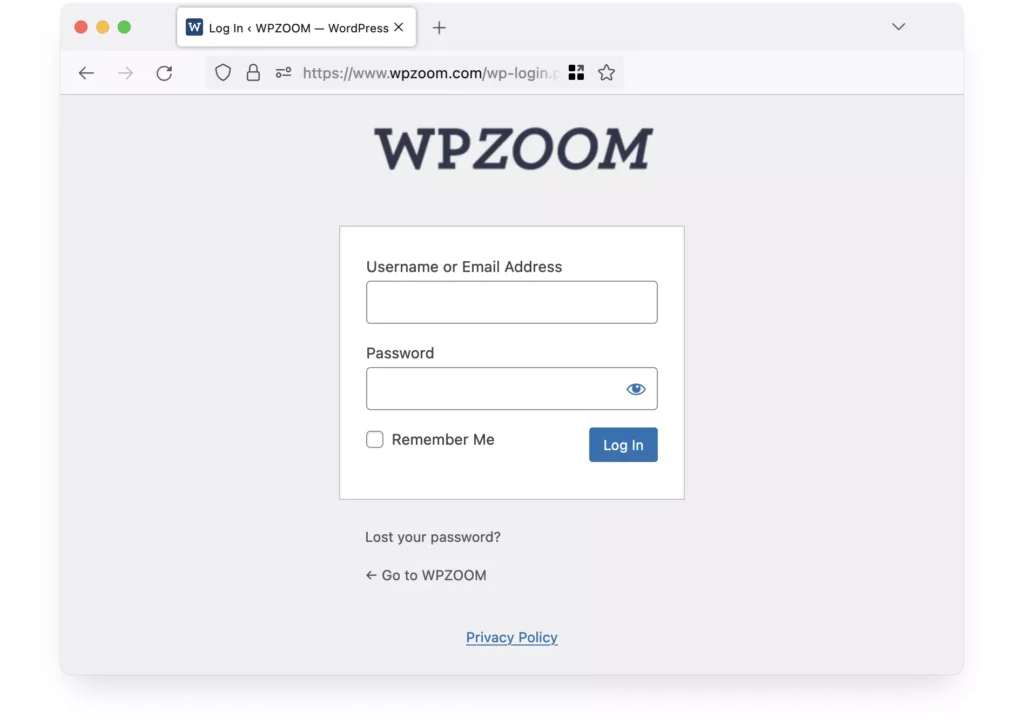
- Log in to Your Website: Open your web browser and enter your website’s URL, followed by /wp-admin/. For example, if your site is www.example.com, you would type www.example.com/wp-admin/. This will take you to the WordPress login page.
- Enter Your Credentials: You’ll need to enter your username or email address and your password. These are the details you set up when you first created your WordPress site.
If you’ve forgotten your password, don’t panic! There’s a “Lost your password?” link right below the login form. Just click it, follow the instructions, and you’ll be back in action in no time.
And just like that, you’re in!
For a detailed guide on logging in, check out our article on How to Log in to Your WordPress Admin Dashboard.
How to Customize the WordPress Dashboard
The WordPress Dashboard is designed to be flexible, allowing you to tailor it to your specific needs. Customizing your Dashboard can help streamline your workflow, making it easier to manage your website. Let’s walk through some of the ways you can tweak the Dashboard to make it your own.
1. Rearrange Dashboard Widgets
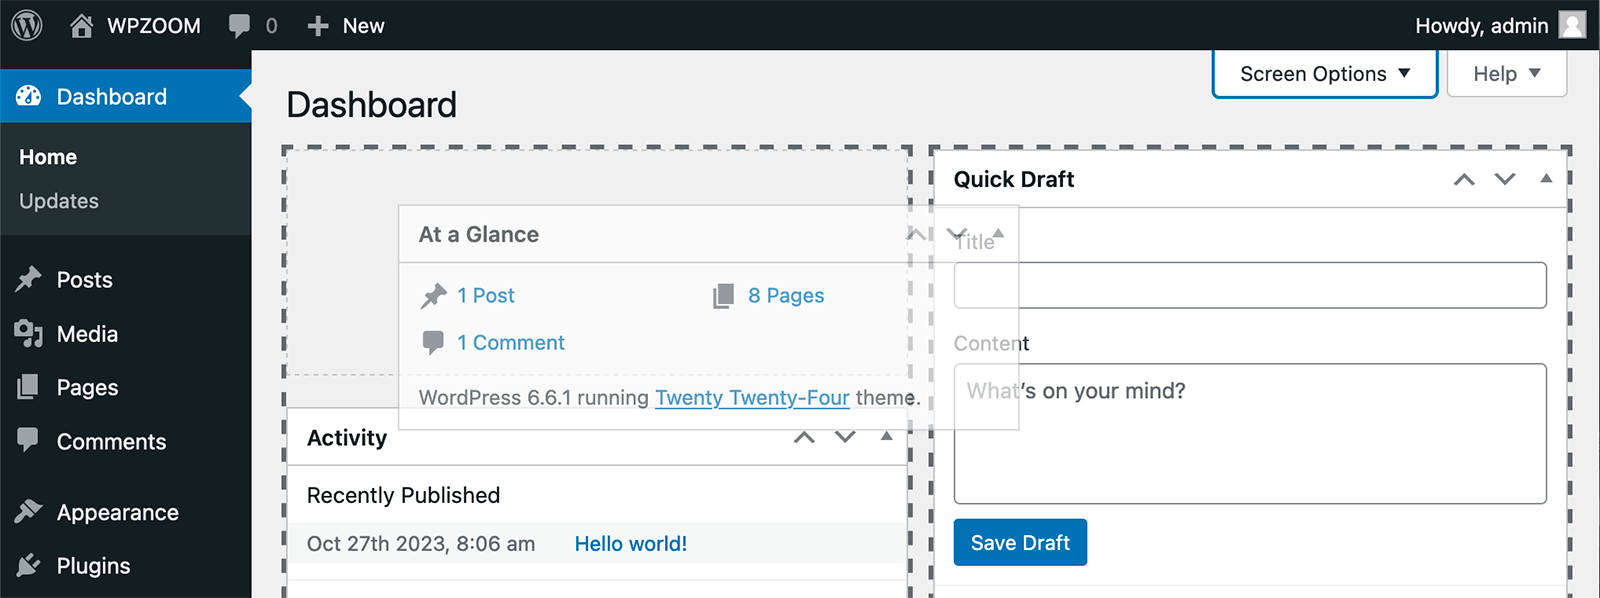
The WordPress Dashboard comes with several default widgets, like “At a Glance,” “Activity,” and “Quick Draft.” You can rearrange these widgets to prioritize the information you use most.
Simply click and drag a widget’s title bar to move it around the Dashboard. You can position it wherever it suits you best.
2. Hide or Show Dashboard Widgets
If there are widgets you never use, you can hide them to declutter your Dashboard.
Click the “Screen Options” tab in the top right corner of the Dashboard. A dropdown will appear, allowing you to check or uncheck boxes to show or hide specific widgets.

3. Change the Dashboard Color Scheme
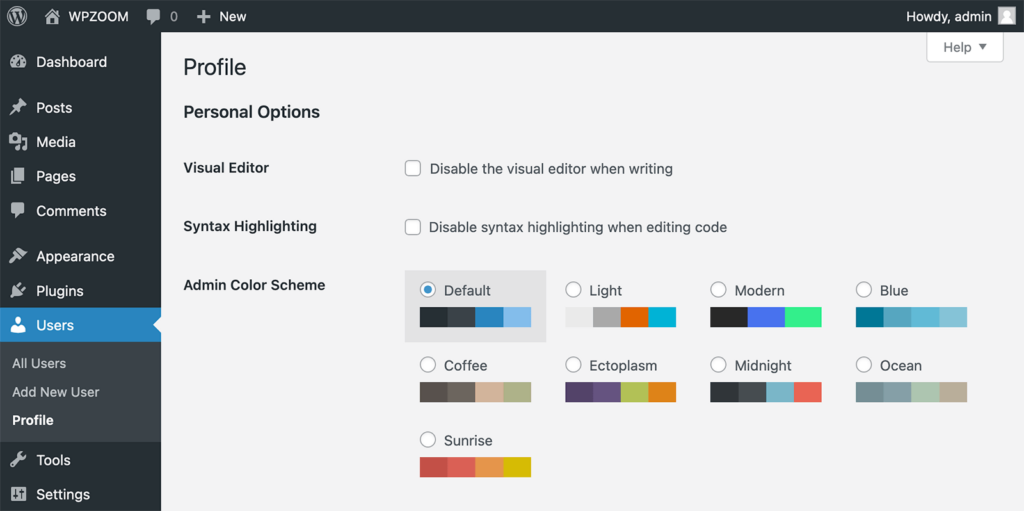
WordPress offers several color schemes for the Dashboard to suit your preferences.
Go to Users > Profile, and you’ll find several color scheme options under “Admin Color Scheme.” Choose the one you like, and the change will be applied instantly.
4. Customize the Admin Menu
The Admin Menu is the vertical menu on the left side of your Dashboard. You can customize this menu to include only the items you need.
Plugins like Admin Menu Editor allow you to rearrange, rename, and even hide menu items, creating a more personalized workspace.
5. Add Custom Dashboard Widgets
If you want to display custom information or quick links directly on your Dashboard, you can add custom widgets.
Plugins like Dashboard Widgets Suite let you create new widgets, giving you quick access to the data or links that are most important to you.
6. Use Plugins for Further Customization
There are numerous plugins available that can extend the functionality and customization of your WordPress Dashboard. For example, WP Custom Admin Interface allows you to easily customize the admin menu, login screen, dashboard widgets, and more, giving you full control over the appearance and functionality of your WordPress backend.
How to Use the WordPress Dashboard
In this section, we’ll break down the main components of the Dashboard, so you’ll know exactly where to go to perform various tasks. Whether you’re adding a new post, managing comments, or tweaking your site’s appearance, this guide will help you navigate the Dashboard like a pro.
WordPress Admin Menu
The WordPress Admin Menu is the vertical menu located on the left side of your Dashboard. It serves as the navigation hub for all your website management tasks. Each menu item opens up a set of submenus that provide access to specific features and settings.
Let’s explore the key sections of the Admin Menu:
- Dashboard: This is the home of the WordPress Dashboard, where you can get an overview of your site’s activity, including recent posts, comments, and updates.
- Posts: This is where you create and manage blog posts. You can view all posts, add new ones, and organize them with categories and tags.
- Media: The Media Library is where all your uploaded images, videos, and other files are stored. You can add new media files, as well as edit or delete existing ones.
- Pages: Similar to Posts, this section allows you to create and manage static pages on your site, such as your homepage, contact page, or about page.
- Comments: Here, you can manage comments left by visitors on your posts. You can approve, reply to, edit, or delete comments.
- Appearance: The Appearance section is where you control the look and feel of your site. You can change themes, customize your site, manage widgets, and edit your site’s navigation menus.
- Plugins: In this section, you can manage all your WordPress plugins. Plugins add extra functionality to your site, such as SEO tools, security features, or performance enhancements.
- Users: If you have multiple people working on your site, the Users section is where you manage their accounts. You can add new users, assign roles, and edit user profiles.
- Tools: The Tools section includes import and export functions, as well as site management tools provided by certain plugins.
- Settings: The Settings menu is where you configure your site’s core settings, including general options like your site title and tagline, reading settings, and more.
Posts and Pages
One of the most important aspects of managing a WordPress site is creating and organizing content. This is done primarily through Posts and Pages. While they may seem similar, they serve different purposes on your website.
Posts
Posts are typically used for blog content or news updates. They are displayed in reverse chronological order, meaning your newest posts appear at the top.
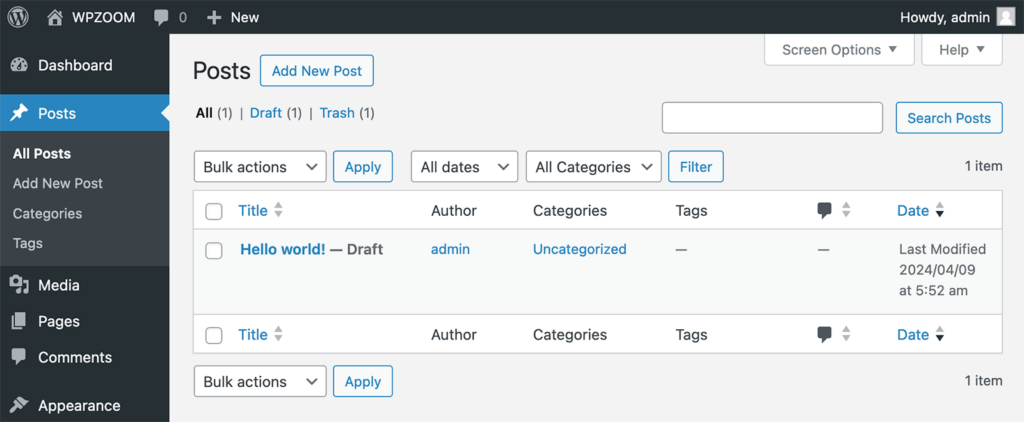
To create a new post, go to Posts > Add New Post. This will open the post editor, where you can enter your title, write your content, and format it using the block editor.
Categories and Tags
Organizing your content is crucial for both user experience and search engine optimization (SEO). WordPress provides two powerful tools for this: Categories and Tags. While they might seem similar, each serves a unique purpose in structuring your posts.
Categories are broad groupings of your posts. They are hierarchical, meaning you can create sub-categories within main categories. This is useful for grouping related content under a broader topic.
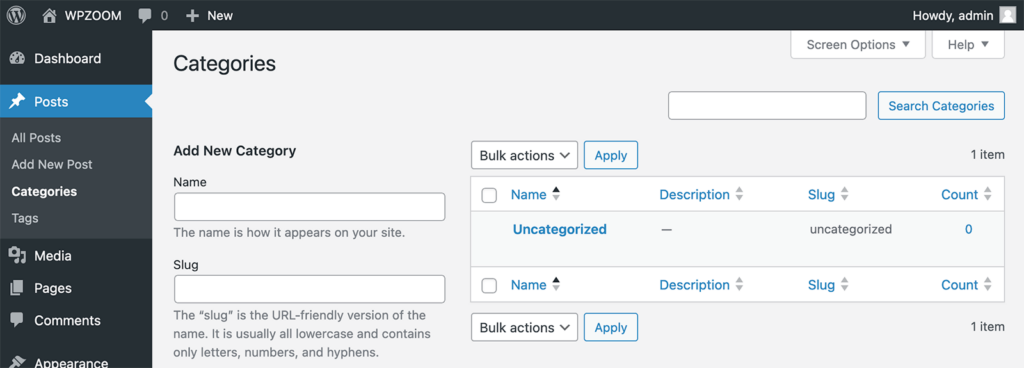
You can create and manage categories by going to Posts > Categories in the WordPress Admin Menu. Here, you can add new categories, assign parent categories to create a hierarchy and manage existing ones.
When creating or editing a post, you can assign it to one or more categories. This is done in the Categories section of the post editor, which is usually found on the right side of the screen.
Tags are more specific than categories and are used to describe individual aspects of a post. Unlike categories, tags are not hierarchical, and they allow you to label posts with multiple keywords or phrases.
Tags can be created on the fly when you’re editing a post. Simply type in the relevant keywords in the Tags section and hit enter. You can also manage tags by going to Posts > Tags.
Tags are assigned to posts in the same way as categories. They help with the micro-categorization of content, making it easier for visitors to find posts on similar topics.
Pages
Pages are used for static content that doesn’t change frequently, like your homepage, about page, or contact page. Unlike posts, pages are not organized by date and do not use categories or tags.
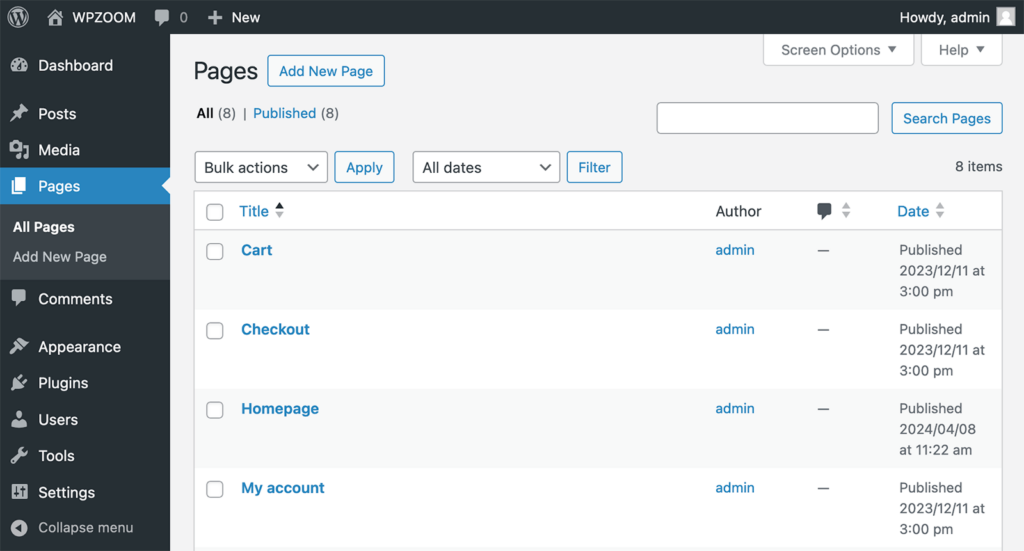
To create a new page, go to Pages > Add New Page. Similar to posts, you’ll use the block editor to add content, but pages often focus more on providing essential information rather than regular updates.
Understanding the difference between posts and pages is key to effectively managing your site’s content. While posts help you keep your content dynamic and engaging, pages provide structure and essential information to your visitors.
Media Library
The Media Library is where all your site’s media files—images, videos, audio files, and documents—are stored and managed. It’s an essential part of the WordPress Dashboard, especially if your website relies heavily on visual content.
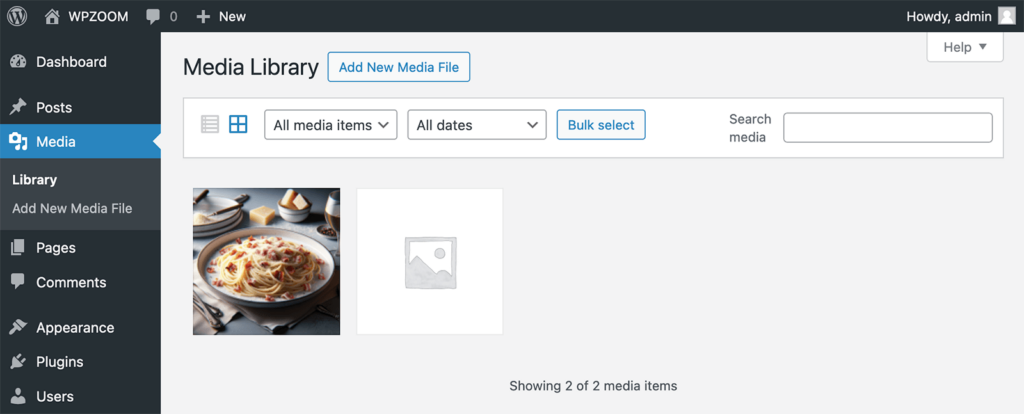
To access the Media Library, navigate to Media > Library in the WordPress Admin Menu. Here, you’ll see a grid or list view of all the media files you’ve uploaded to your site.
To upload new files, click the Add New Media File button at the top of the Media Library. You can either drag and drop files from your computer or select files to upload. WordPress supports a wide range of file types, including JPG, PNG, GIF, PDF, MP4, and more.
While the Media Library doesn’t use categories or tags like posts, you can search for files by name, filter them by date, and view them in grid or list format to find what you need quickly.
Click on any media file in the library to view its details and edit information like the title, caption, alt text, and description. For images, you can also perform basic edits such as cropping, rotating, and scaling directly within WordPress.
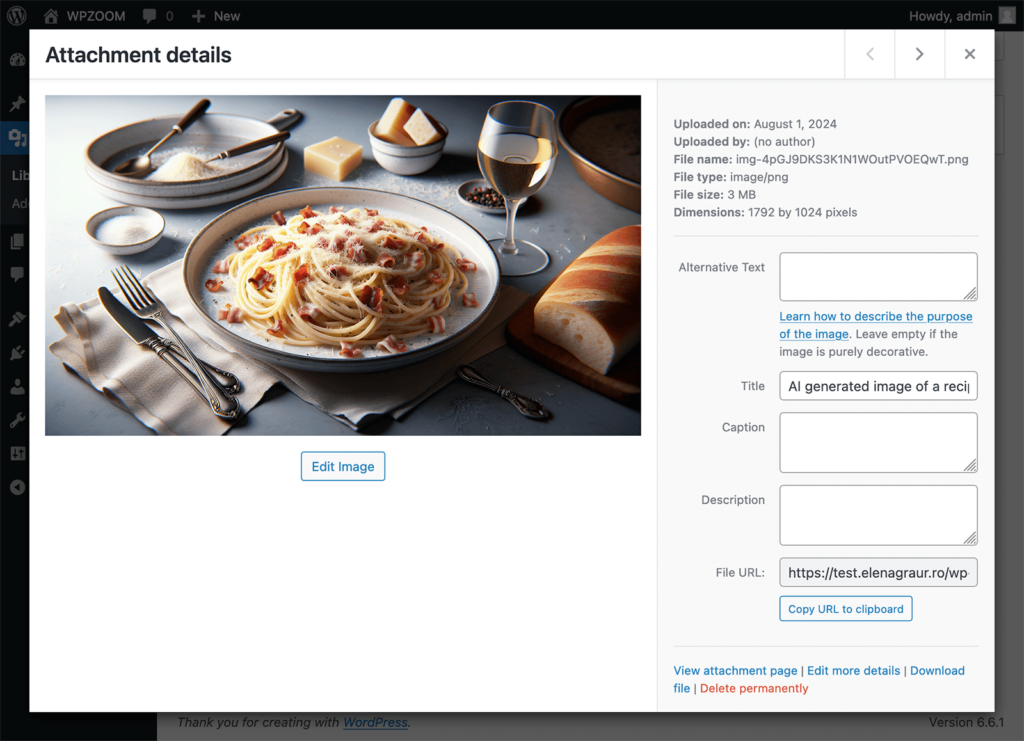
To delete a file, click on the media item and select Delete Permanently. Be cautious when deleting files, as this action cannot be undone and may affect the content where the media was used.
Comments
The Comments section in WordPress is where you can manage all the feedback and discussions happening on your posts. Engaging with comments is an important aspect of building a community around your content, as it allows you to interact directly with your readers.
To manage comments, navigate to Comments in the WordPress Admin Menu. Here, you’ll see a list of all the comments left on your site, whether they are approved, pending, or marked as spam.
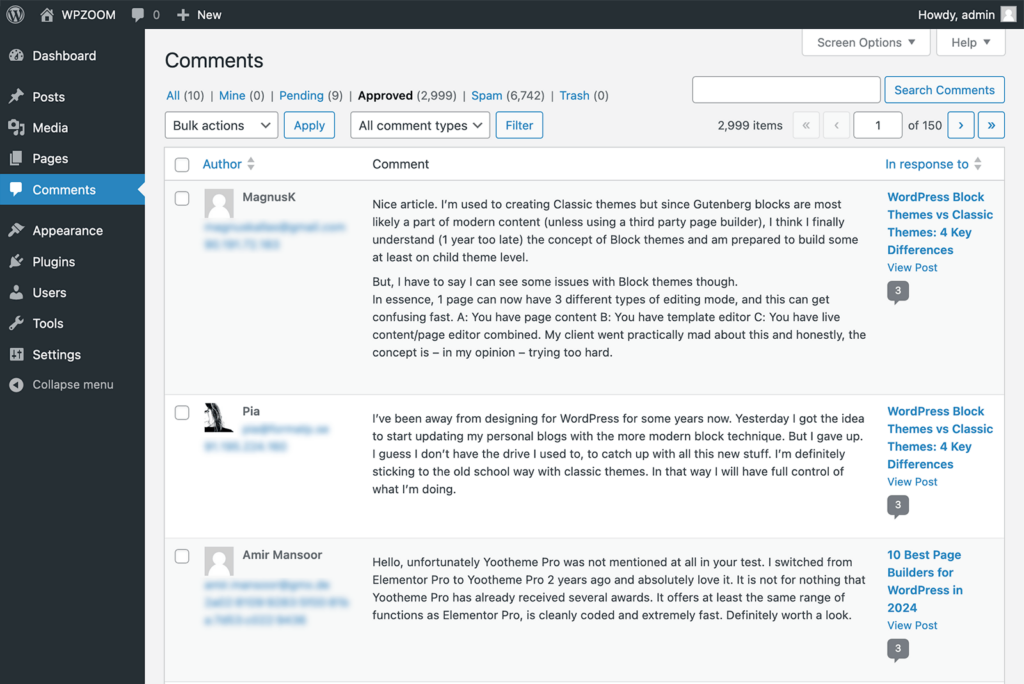
Engaging with your readers by replying to their comments is a great way to build community and encourage further interaction. To reply to a comment, simply click the “Reply” link under the comment in the Comments section. This will allow you to respond directly from the WordPress Dashboard.
You can control how comments are handled on your site by adjusting the settings in Settings > Discussion. Here, you can choose whether comments require manual approval, whether users must be logged in to comment, and more.
Appearance
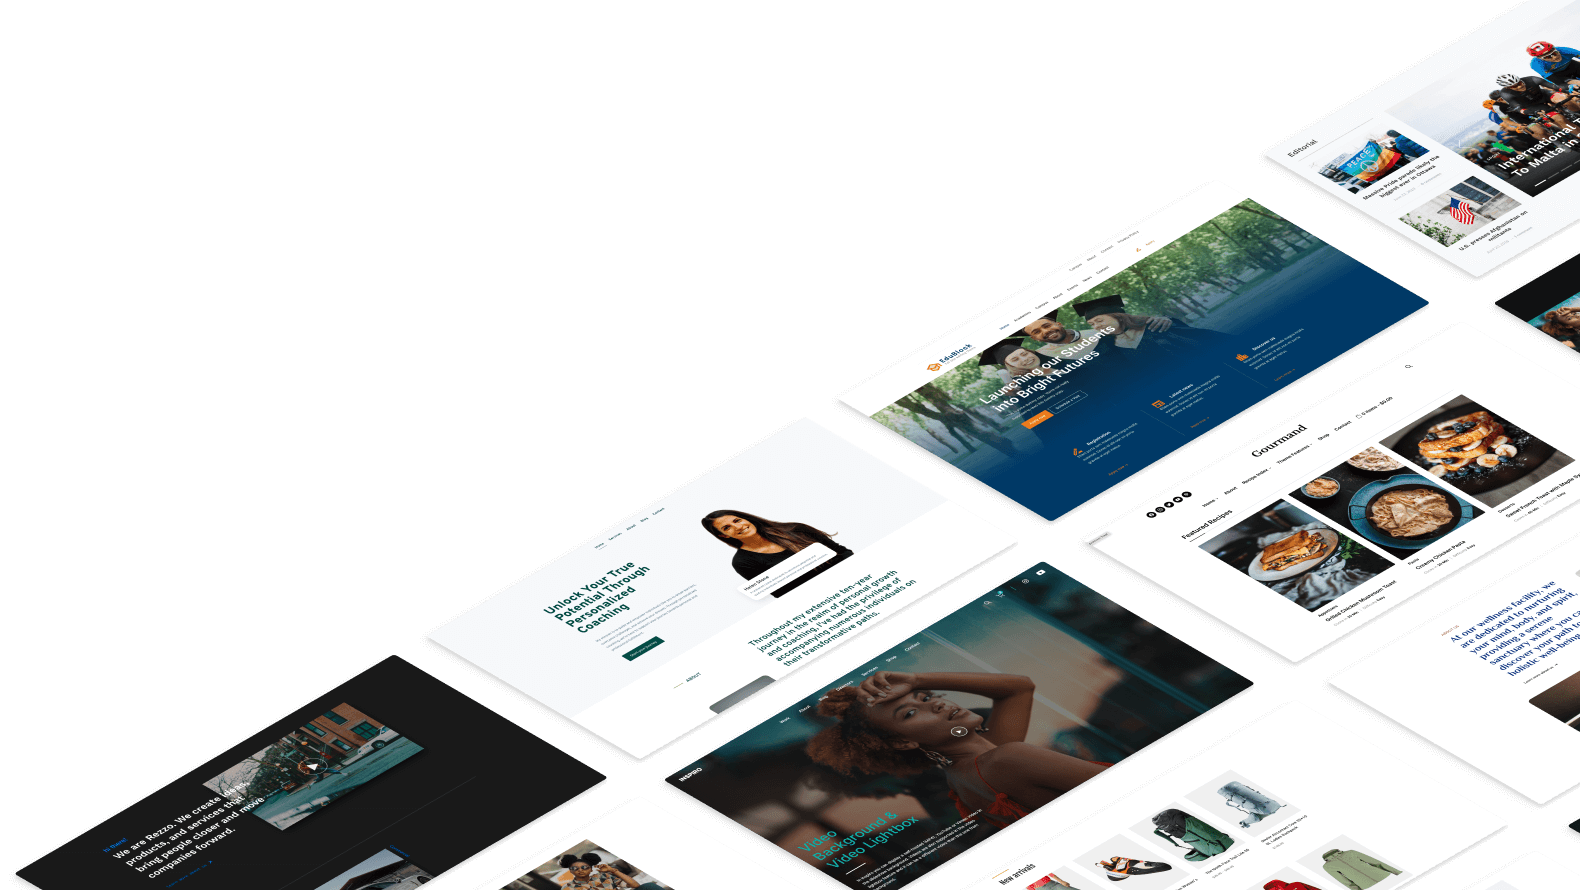
The Appearance section in the WordPress Dashboard is where you control the look and feel of your website. This is where you can choose and customize themes, manage widgets, and set up your site’s navigation menus.
To browse available themes, go to Appearance > Themes. WordPress offers a variety of free and premium themes that you can preview and install directly from your Dashboard.
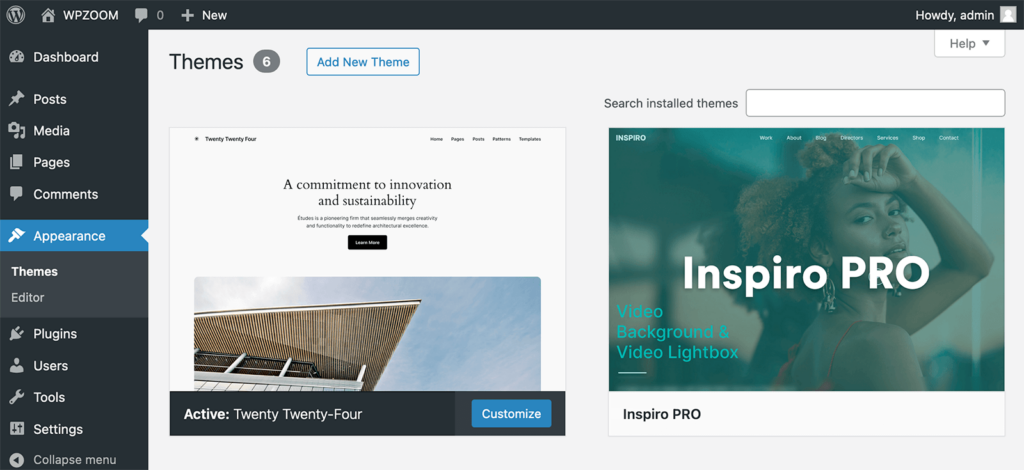
To install a new theme, click the Add New Theme button. You can also search for themes by keyword. For example, if you search “inspiro,” you’ll find the Inspiro theme, our most popular free theme.
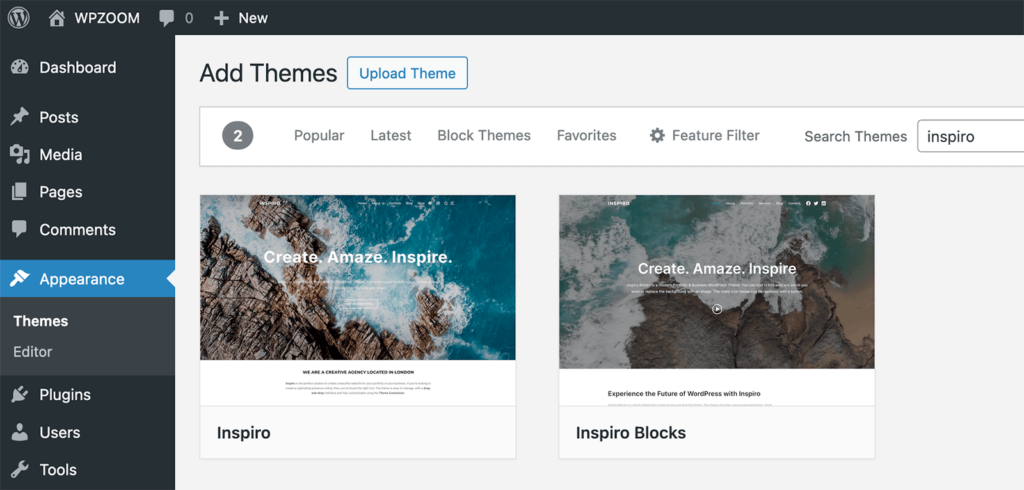
You can also upload a theme you’ve purchased or downloaded from a third-party site like WPZOOM by clicking the Upload Theme button.
Plugins
Plugins are one of WordPress’s most powerful features. They allow you to extend your site’s functionality without writing any code. Whether you want to add contact forms, improve SEO, boost security, or integrate social media, there’s likely a plugin that can help.
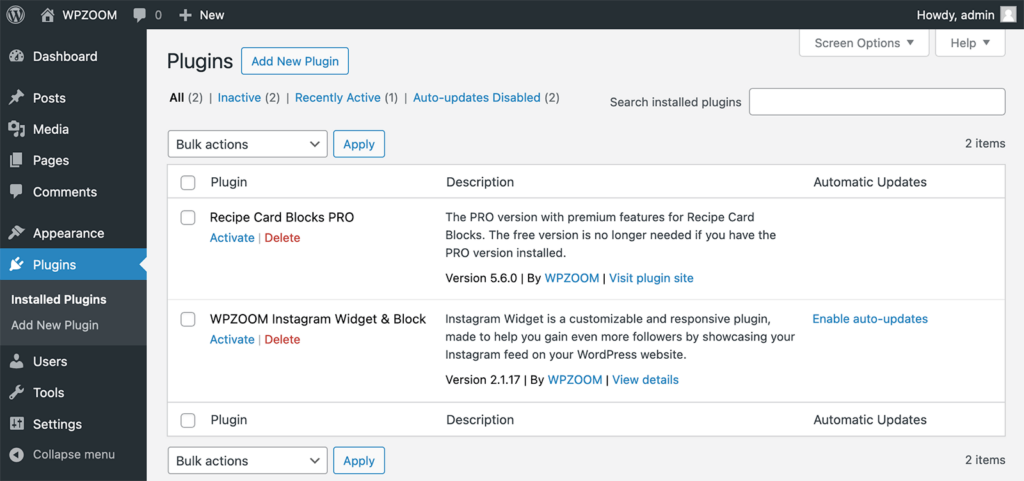
To install a new plugin, go to Plugins > Add New Plugin. Here, you can search for plugins by keyword, browse popular and recommended plugins, or upload a plugin file you’ve downloaded.
Once you find a plugin you want to install, click the Install Now button. After installation, you’ll need to activate the plugin to start using it.
Users
The Users section in WordPress is where you manage all the accounts that have access to your website. Whether you’re running a blog with multiple authors, managing a team, or just controlling your own account, understanding how to manage users effectively is crucial.
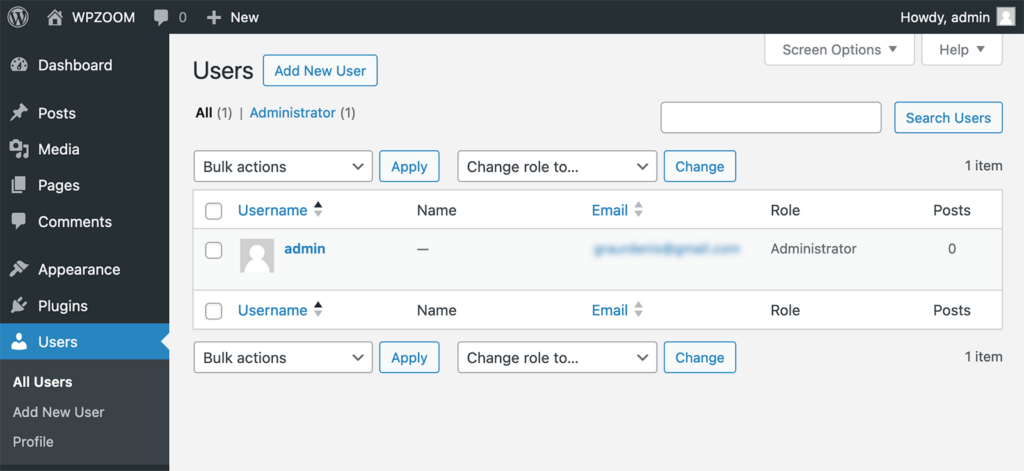
To add a new user, go to Users > Add New. Here, you’ll enter the user’s username, email address, and password. You’ll also assign them a role, which determines their permissions on the site.
You can edit user profiles by going to Users > All Users and clicking on a username. This allows you to change their role, update their profile information, or reset their password.
Each user can manage their own profile by going to Users > Profile. Here, you can update your email address, change your display name, and choose a different admin color scheme for your dashboard.
Tools
The Tools section in WordPress offers various utilities that help you manage and maintain your website more effectively. These tools are often used for tasks like importing and exporting data, managing site health, and other specialized functions that might not be needed on a daily basis but are important for specific situations.
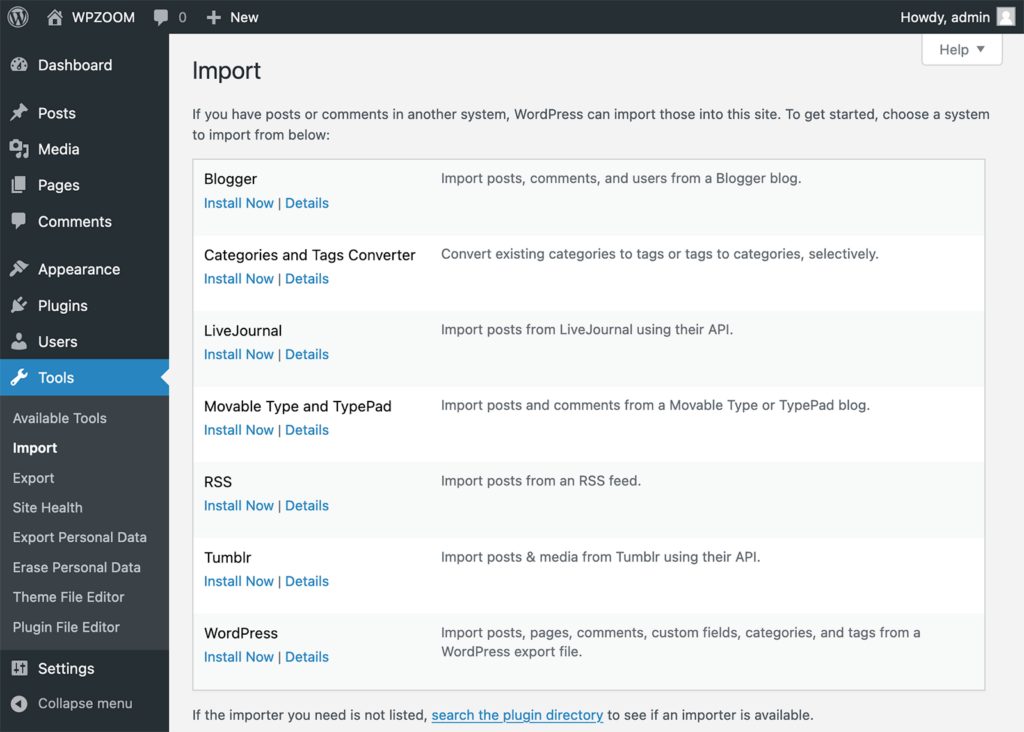
- The Import tool allows you to bring content into your WordPress site from other platforms or file formats.
- The Export tool is useful if you want to move your content to another WordPress site or back up your posts, pages, comments, custom fields, categories, and tags.
- The Site Health tool provides an overview of your website’s performance and security. It checks your site for potential issues and offers recommendations for improving speed, security, and overall functionality.
Settings
The Settings section in WordPress is where you configure the core aspects of your site. From general site information to advanced configurations, the Settings menu offers a variety of options that allow you to control how your site functions and behaves. It’s important to familiarize yourself with these settings to ensure your site operates smoothly and according to your preferences.
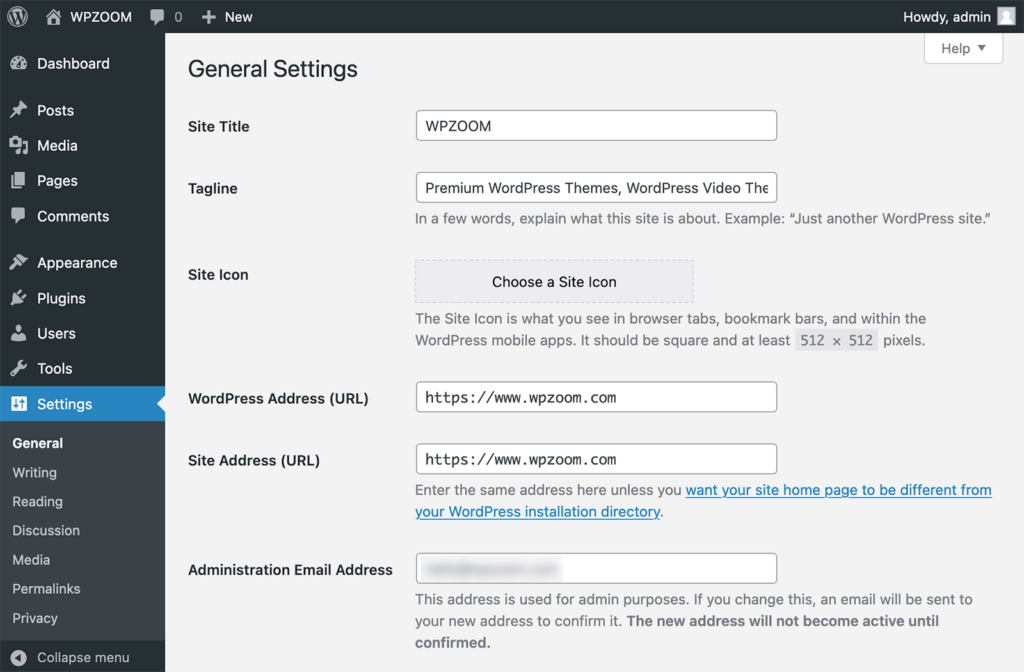
Some settings, particularly those related to permalinks and search engine visibility, can have significant effects on your site’s performance and SEO. Make changes with caution and always back up your site before adjusting critical settings.
Bottom Line
Whether you’re a beginner or looking to refine your skills, the WordPress Dashboard offers everything you need to build and manage a successful website. Take the time to explore, experiment, and customize—your site will be better for it. Remember, every tweak and adjustment brings you one step closer to making your WordPress site truly yours.
