Meta tags are small snippets of code that play a big role in SEO. They help search engines understand your site’s content, boosting visibility and driving traffic.
In this article, you’ll discover why they might be missing from your default installation, and learn how to add meta tags in WordPress using plugins or manually. Let’s optimize your site for better search engine rankings.
Table of Contents
- Why Are Meta Tags Missing in the Default WordPress Installation?
- How to Add Meta Tags in WordPress Using a SEO Plugin
- How to Add Meta Tags in WordPress Manually
- Are Meta Tags Necessary?
Why Are Meta Tags Missing in the Default WordPress Installation?
When you set up a new WordPress site, you might notice that some meta tags are not automatically included. This omission is intentional.
Meta tags like descriptions and keywords need to be unique to each post or page. A default installation of WordPress cannot automatically generate these unique tags because it cannot predict the specific content of each post.
For instance, the description meta tag provides a summary unique to each post, while the keywords meta tag lists relevant words found within the post. WordPress, despite its capabilities, can’t read your mind or your content’s specific context. To provide search engines with accurate and unique information for each page, you need to manually add these meta tags.
How to Add Meta Tags in WordPress Using a SEO Plugin
One of the easiest and most effective ways to add meta tags to your WordPress site is by using an SEO plugin like Yoast SEO, Rank Math or SEOPress. These plugins provide comprehensive tools for optimizing your site’s SEO, including adding and managing meta tags without the need for coding knowledge.
Let’s see how you can add meta tags using the popular Yoast SEO plugin:
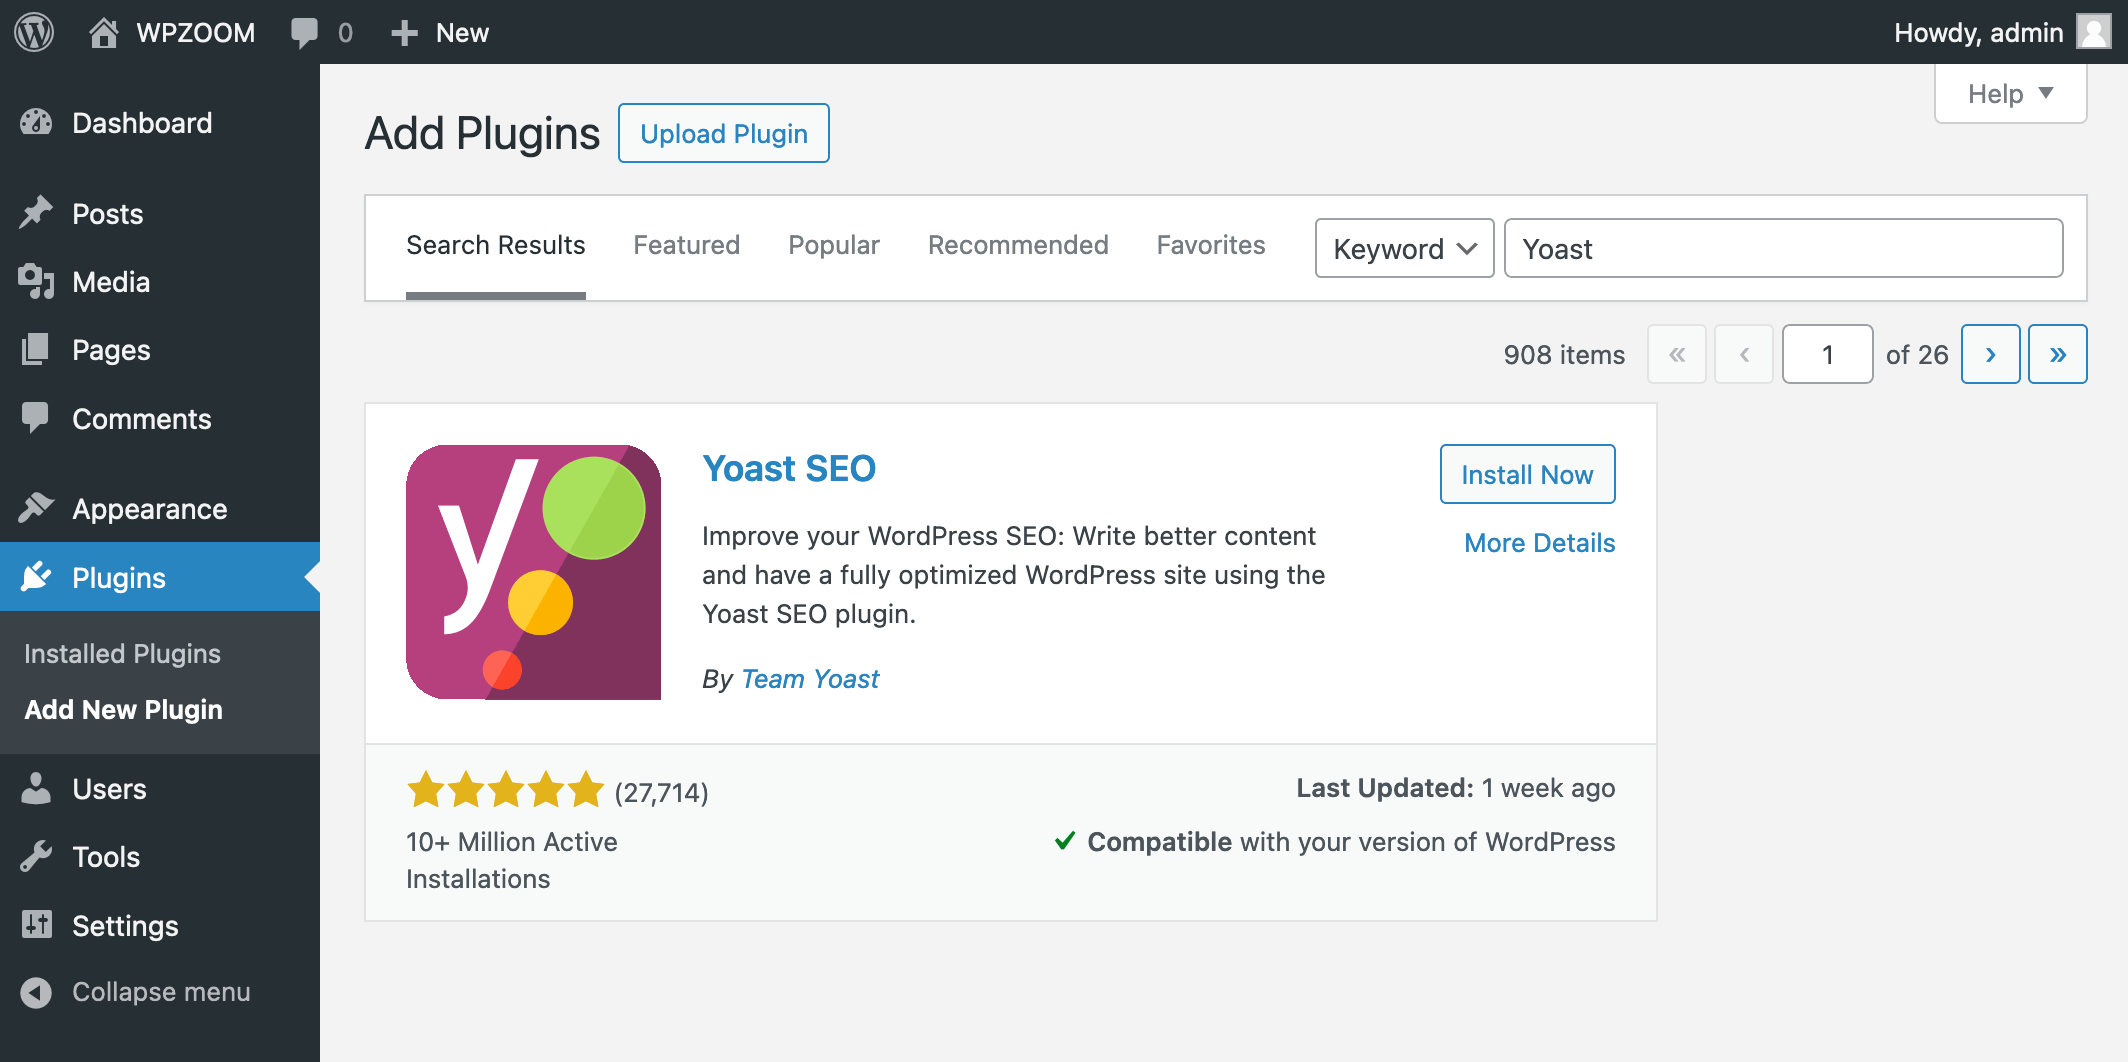
- Go to your WordPress dashboard and navigate to Plugins > Add New Plugin.
- In the search bar, type Yoast.
- Click Install Now next to the Yoast SEO plugin. Once installed, click Activate.
- From the WordPress dashboard, navigate to Posts/Pages and start editing the post/page where you want to add meta tags.
- Scroll down to the Yoast SEO section, usually found below the main content editor.
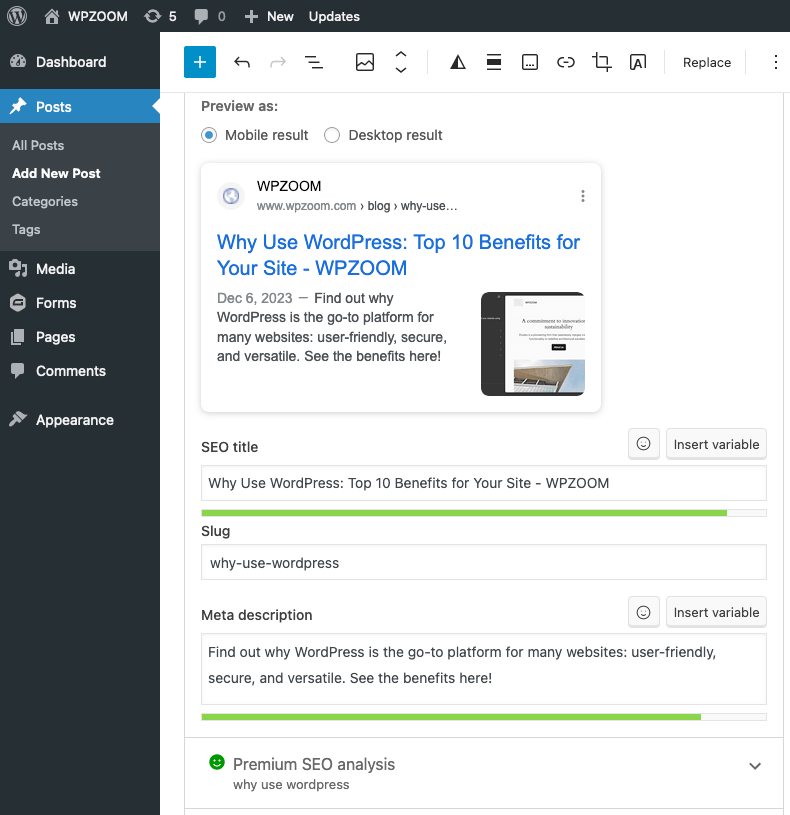
- In this section, you can define the meta title and meta description for the post/page you are editing.
- Yoast SEO provides a snippet preview that shows how your page will appear in search results. Adjust your title and description until the preview looks optimal.
To ensure consistency across your site, Yoast SEO allows you to set default meta tags for all your posts, pages, and custom post types. By navigating to Yoast SEO > Settings and selecting the Content Types tab, you can define templates for the SEO title and meta description.
These templates automatically generate meta tags based on your predefined structure, such as using the post title followed by your site name for SEO titles, or using the post excerpt for meta descriptions. This feature ensures that even if you forget to manually set meta tags for individual posts or pages, they will still be optimized based on your default settings, saving you time and maintaining a consistent format across your content.
How to Add Meta Tags in WordPress Manually
For those who prefer a hands-on approach, adding meta tags manually gives you full control over your site’s SEO. This method involves editing your theme’s code directly to insert meta tags. While it requires a bit more technical knowledge, it can be rewarding for those looking to understand the inner workings of their WordPress site.
However, it’s important to be aware of the potential risks involved in editing theme files manually.
Risks of Editing the Theme’s Code Manually
- Theme Updates: When you update your theme, any changes you made to the theme files will be overwritten. This means you’ll lose your customizations and will need to reapply them after every update.
- Errors and Site Breakage: Making a mistake while editing the code can break your site, causing it to become inaccessible or display incorrectly.
- Security Risks: Incorrectly editing theme files can introduce security vulnerabilities, potentially exposing your site to attacks.
Due to these risks, it is generally recommended to use a plugin like WPCode to add meta tags, as it provides a safer and more manageable way to insert custom code.
Adding Meta Tags Using the WPCode Plugin
Using WPCode (formerly Insert Headers and Footers) is a safer and more efficient way to add meta tags to your WordPress site without directly editing the theme files. Here’s how to do it:
1. From the WordPress Dashboard, navigate to Plugins > Add New Plugin.
2. Search for “WPCode”. Click Install Now and then Activate.
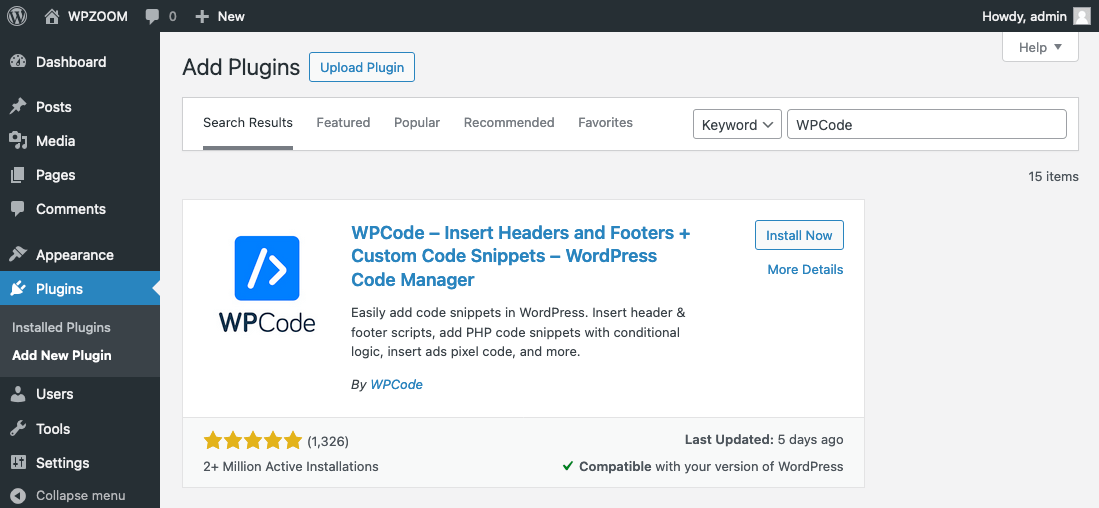
3. Once the plugin is activated, go to Code Snippets > Header & Footer in the WordPress Dashboard.
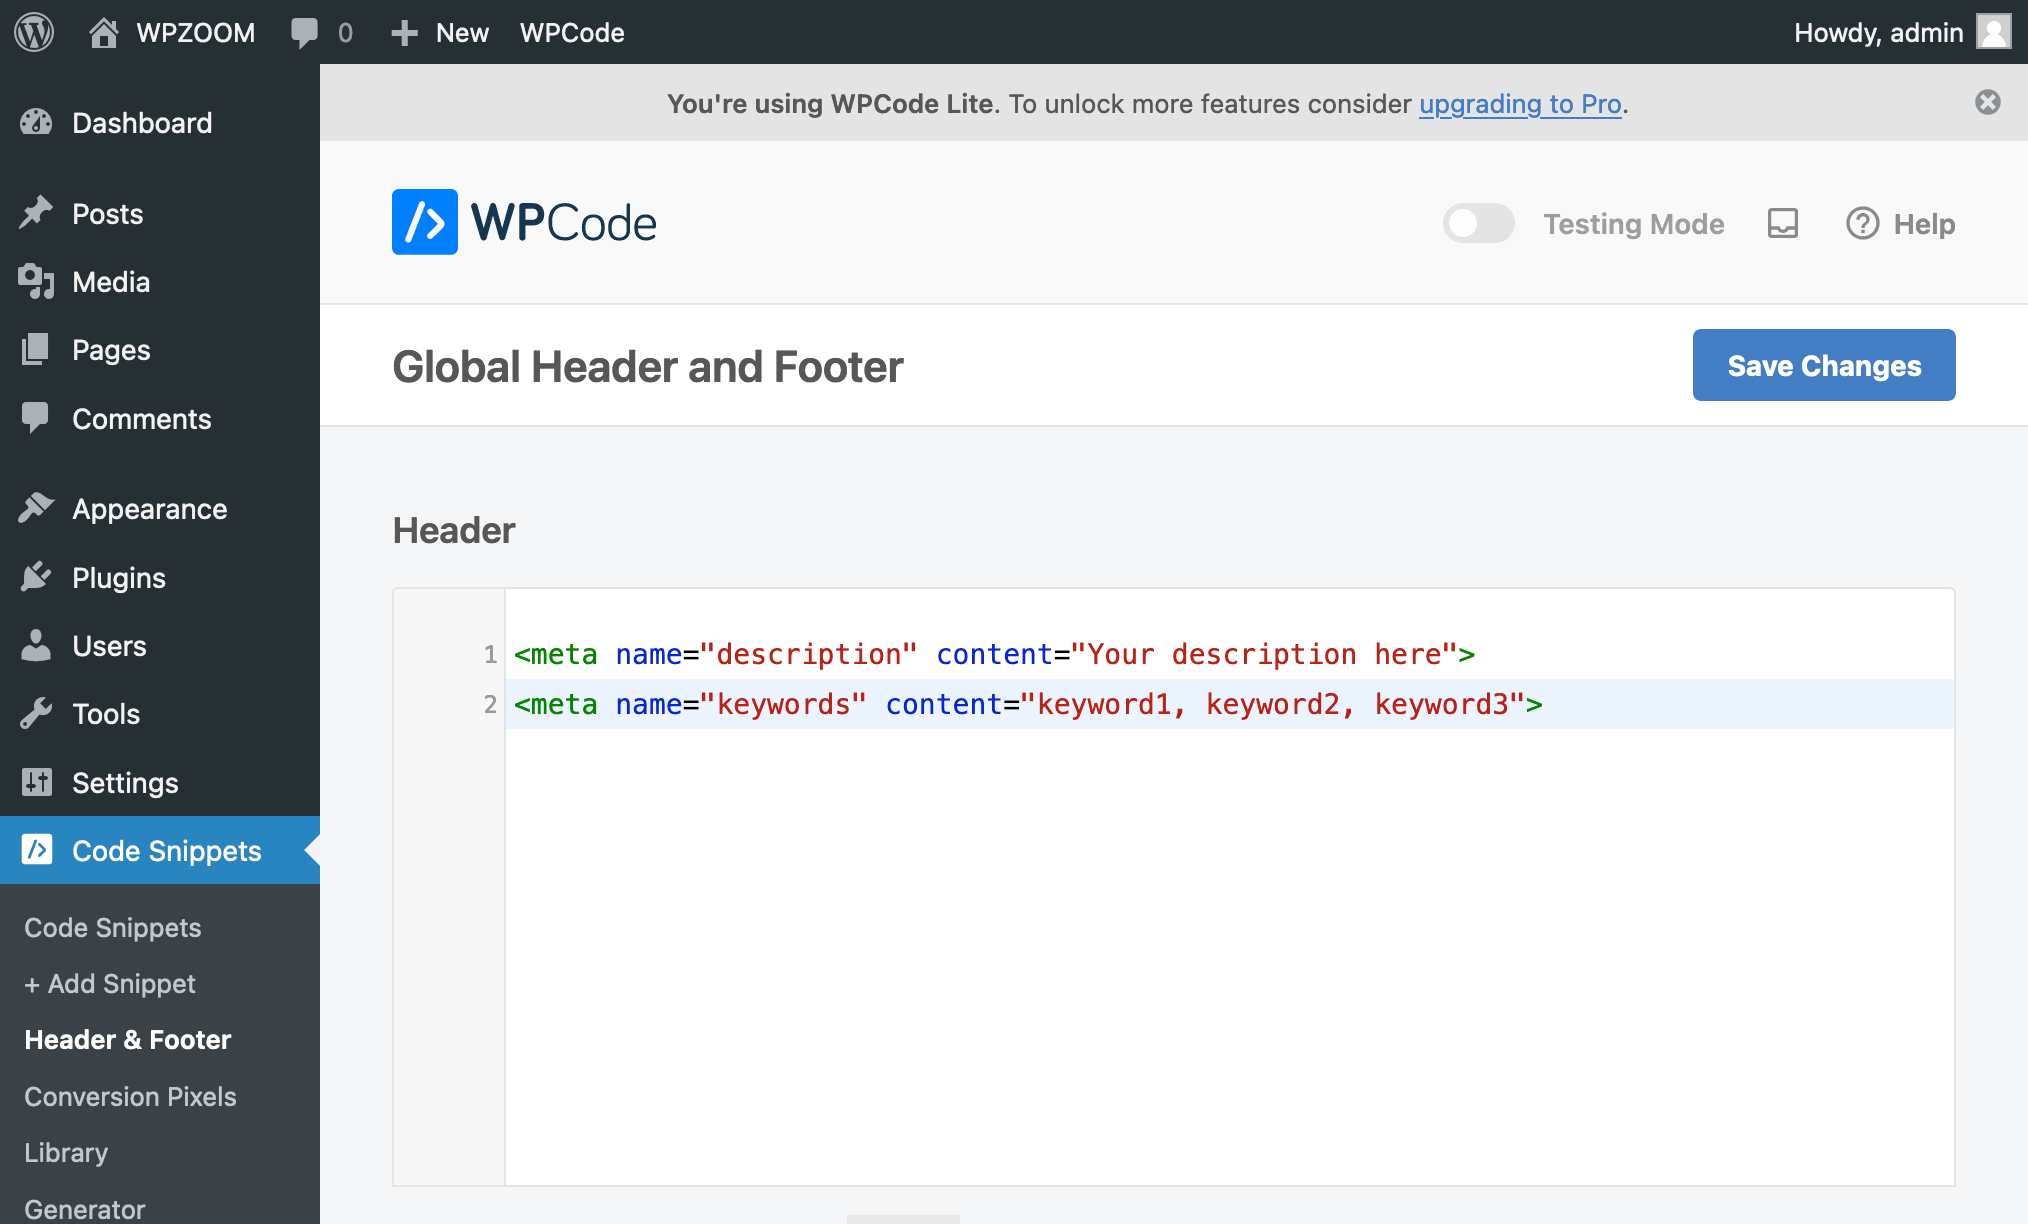
4. In the Header section, you can add your meta tags. For example:
<meta name="description" content="Your description here">
<meta name="keywords" content="keyword1, keyword2, keyword3">
5. Click Save Changes to add the meta tags to your site.
If you want to add different meta tags to specific pages or posts, you can use conditional tags. For example:
<?php if (is_single()) : ?>
    <meta name="description" content="Specific post description">
    <meta name="keywords" content="post keyword1, post keyword2">
<?php elseif (is_page('about')) : ?>
    <meta name="description" content="About page description">
    <meta name="keywords" content="about, company, information">
<?php endif; ?>
You can also use PHP functions to dynamically generate meta tags based on the content of the page or post. For example:
<?php if (is_single() || is_page()) : ?>
  <meta name="description" content="<?php echo get_the_excerpt(); ?>">
  <meta name="keywords" content="<?php echo implode(', ', wp_get_post_tags($post->ID, array('fields' => 'names'))); ?>">
<?php endif; ?>
After updating your theme files, it’s crucial to test your changes. Visit your site and view the page source to ensure the meta tags appear correctly.
Adding Meta Tags Manually in Standard Themes
If you still prefer to add meta tags manually, you can do so by editing the header.php file in standard (non-block) themes. Note that this method is not applicable to block themes, which use a different structure.
First, let’s see what are some tips to minimize the risks of breaking your site or losing changes when the theme updates:
- Backup Your Files: Always back up your theme files before making any changes. This ensures you can restore your site to its previous state if something goes wrong.
- Use a Child Theme: Create and use a child theme for your customizations. This way, your changes won’t be lost when the parent theme updates.
- Test Changes Locally: If possible, test your changes in a local development environment or a staging site before applying them to your live site.
With these precautions in mind, you can proceed with adding meta tags manually. Here is how you can do it:
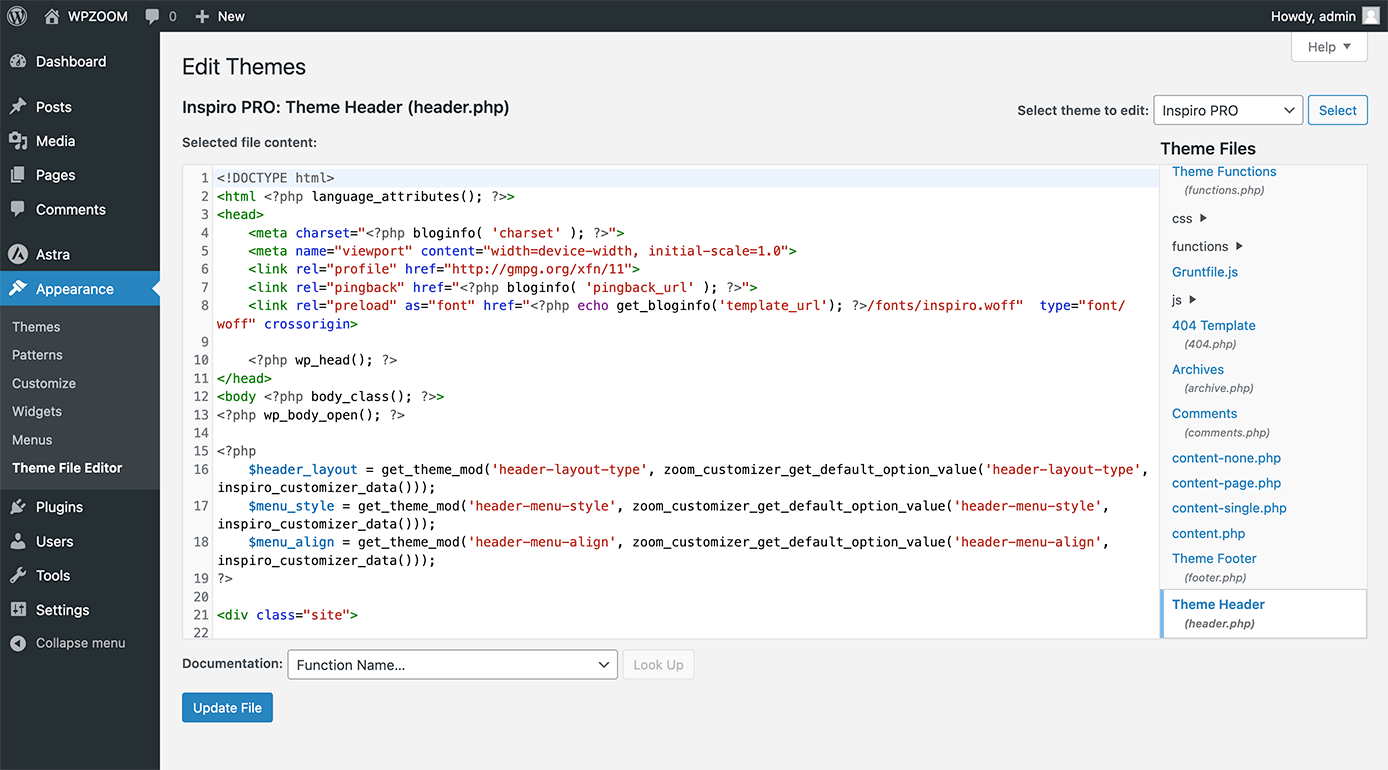
- From your WordPress dashboard, navigate to Appearance > Theme File Editor.
- In the Theme Files section on the right-hand side, find and click on Theme Header (header.php). This file controls the head section of your website where meta tags are placed.
- Within the header.php file, locate the <head> section. This is where you will add your meta tags.
- After adding your meta tags, click the Update File button to save your changes.
It’s essential to check your site’s source code afterward to ensure that the meta tags have been correctly implemented.
Are Meta Tags Necessary?
Now that you know how to add meta tags to your WordPress site, whether using a plugin or manually, let’s discuss whether meta tags like description and keywords are still necessary.
While meta descriptions do not directly affect search engine rankings, they are crucial for improving click-through rates. A well-crafted meta description can entice users to click on your link in search results. Make sure your descriptions are compelling, relevant, and include your target keywords naturally.
The meta keywords tag has lost its significance over the years. Major search engines like Google no longer use meta keywords for ranking purposes. Instead, focus on integrating keywords naturally within your content and other meta tags that still hold value.
While not all meta tags carry the same weight they once did, some still play a vital role in your SEO strategy. Here are a few examples of meta tags that remain necessary and important:
- Meta Title (SEO Title): This tag significantly impacts your search engine rankings and click-through rates. A well-optimized title that includes your primary keywords can improve your site’s visibility and attract more clicks from search engine results pages (SERPs).
- Meta Robots Tag: This tag instructs search engines on how to index and follow your pages. You can use it to control whether a page should be indexed or whether links on the page should be followed.
- Canonical Tag: This tag helps prevent duplicate content issues by specifying the preferred version of a page. It is essential for maintaining good SEO practices and ensuring that search engines understand which page to index when there are multiple versions of the same content.
By understanding the evolving importance of various meta tags, you can improve your site’s visibility and user engagement. Regularly reviewing and updating your meta tags will help ensure your WordPress site remains optimized and competitive in search engine results.

