Plugins are indispensable tools for any WordPress website, enhancing customization, functionality, security, and performance. Understanding how to install WordPress plugins is a crucial skill for anyone managing a site. Fortunately, the process is straightforward and accessible.
This comprehensive guide will walk you through 4 methods to install a WordPress plugin, ensuring you can choose the best approach based on your needs and experience level.
Table of Contents
- Method 1: How to Install WordPress Plugins via Admin Dashboard
- Method 2: How to Upload a Plugin to WordPress Manually
- Method 3: How to Install a WordPress Plugin Manually Using FTP
- Method 4: How to Add a Plugin to WordPress Using cPanel
Whether you opt for the user-friendly admin dashboard, the flexibility of uploading plugins, the advanced FTP method, or the integrated cPanel option, you’ll soon master the art of installing WordPress plugins and unlock your website’s full potential.
Method 1: How to Install WordPress Plugins via Admin Dashboard
The most straightforward way to install WordPress plugins is through the official WordPress Plugins Directory, accessible directly from your WordPress Dashboard. This method is user-friendly and ideal for beginners.
Here’s how you can do it:
- Log in to your WordPress dashboard.
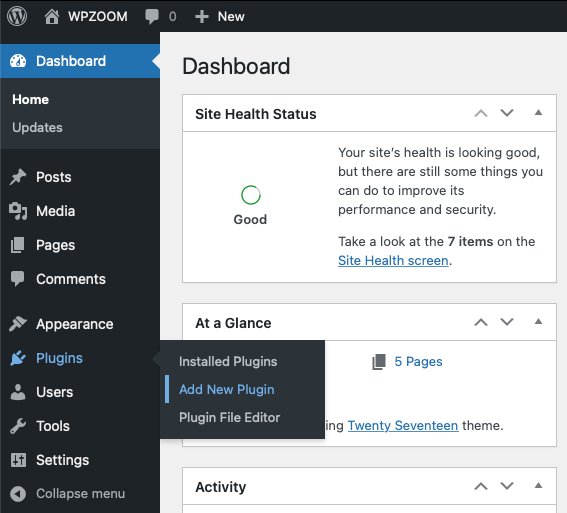
- Navigate to Plugins > Add New Plugin from the left sidebar menu.
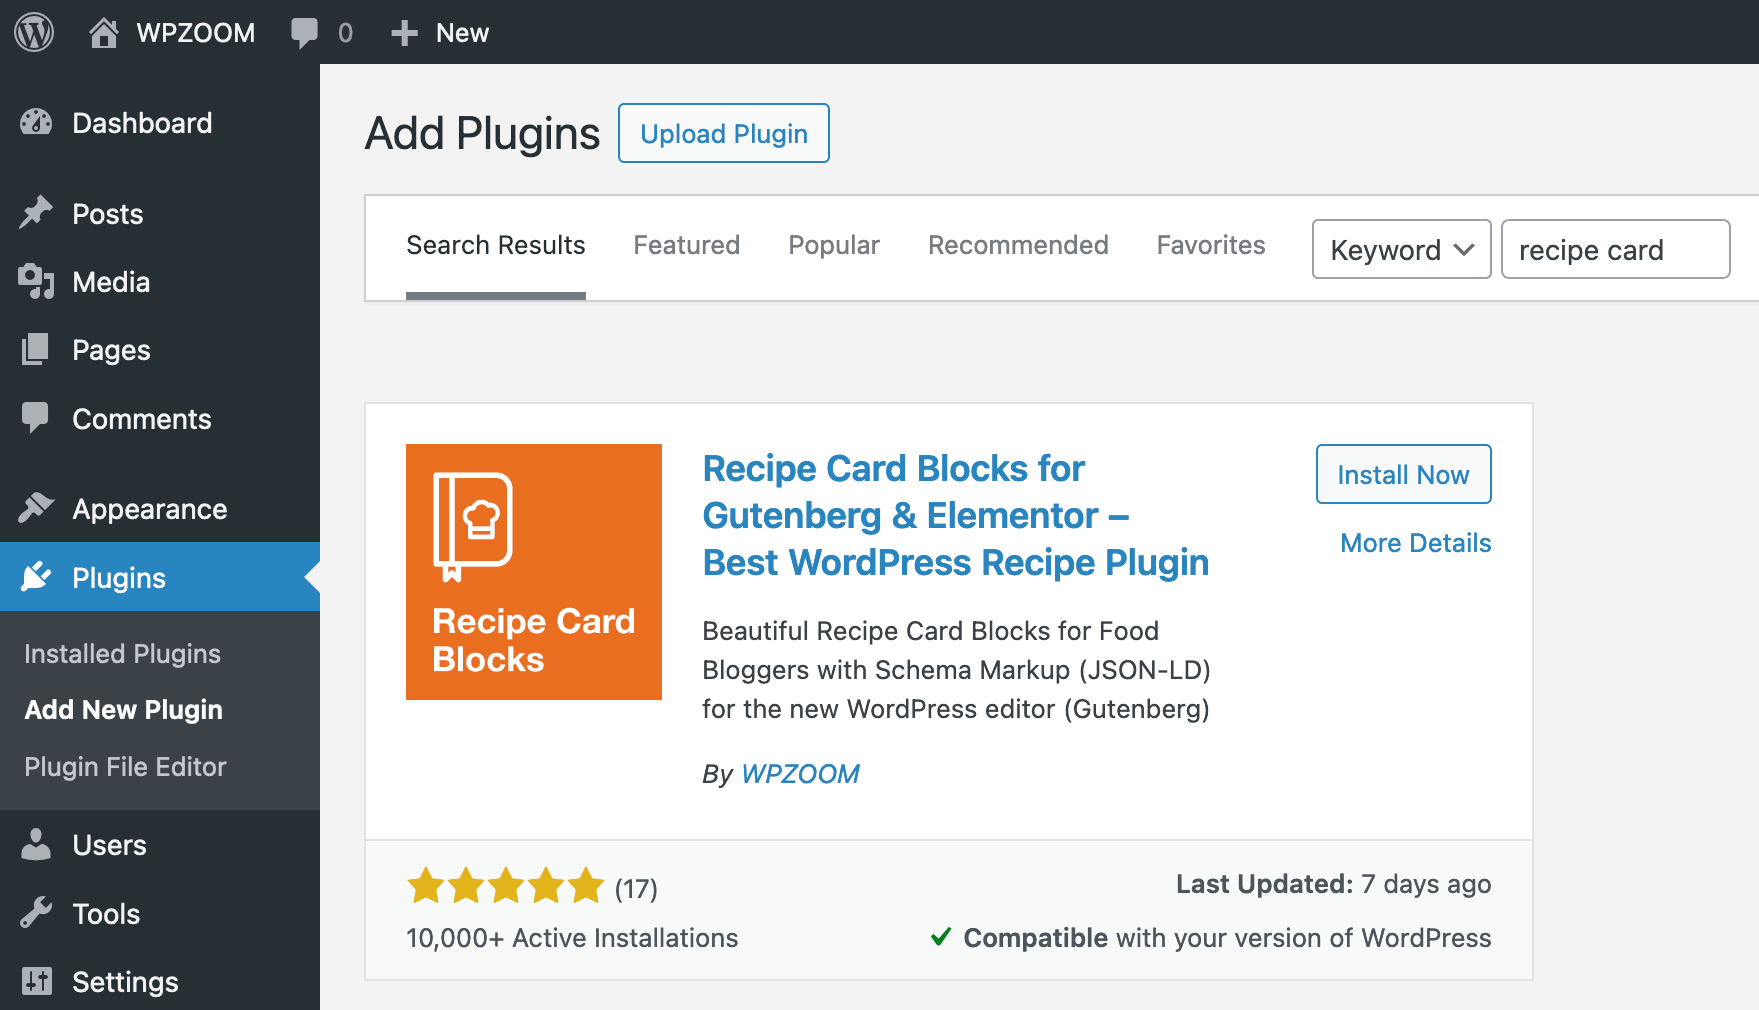
This will open the Plugins Directory, where you can explore a wide range of plugins. - Use the search bar at the top right to find a specific plugin or browse through the recommended plugins until you find one that suits your needs.
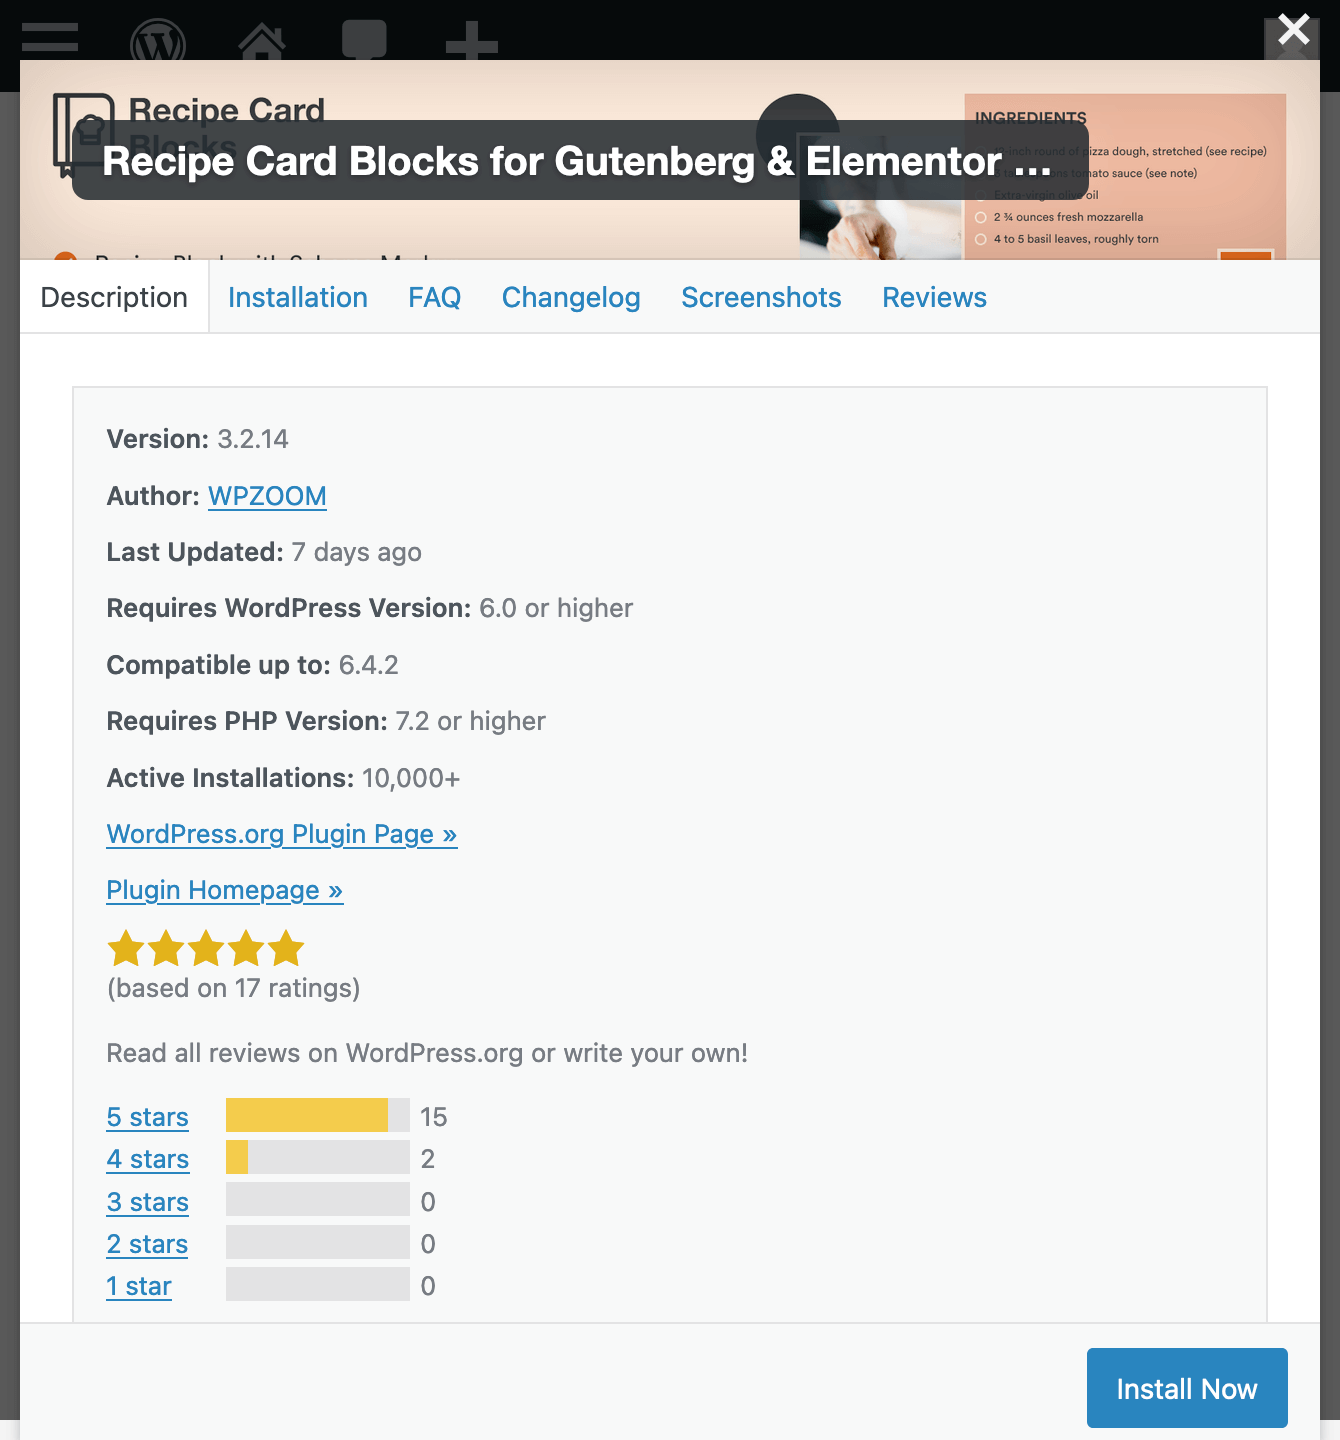
Click on any plugin from the list to view more information, including a detailed description, screenshots, installation numbers, and user reviews. This helps you make an informed decision about which plugin to install. - Once you’ve chosen a plugin, click the Install Now button. WordPress will handle the installation process for you.
- After the installation is complete, click the Activate button. This will enable the plugin on your site, allowing you to start using its features immediately.
- Some plugins may require additional configuration. Navigate to Plugins > Installed Plugins to manage and configure your newly installed plugin according to your preferences.
Installing plugins from the official WordPress Plugins Directory is a hassle-free process that offers a plethora of options to enhance your site.
Method 2: How to Upload a Plugin to WordPress Manually
While the WordPress Plugins Directory offers a wide array of plugins, there may be times when you need to upload a plugin manually, such as when using premium plugins or custom plugins not available in the directory.
Here’s how you can upload a plugin to WordPress:
- Ensure you have the .zip file of the plugin you want to install. You can typically download this from the plugin developer’s website or the marketplace where you purchased it.
- In your WordPress dashboard, go to the left sidebar menu and select Plugins > Add New Plugin.
- On the Add Plugins page, you’ll see an Upload Plugin button at the top. Click on it to proceed.
- Click the Browse button, then locate and select the .zip file of the plugin from your computer.
- After selecting the file, click the Install Now button. WordPress will upload and install the plugin for you.
- Once the installation is complete, click the Activate Plugin button to enable the plugin on your website.
- Go to Plugins > Installed Plugins to ensure your new plugin is activated and configure its settings as required.
Important considerations! When uploading plugins from third-party sources, it’s crucial to ensure they come from reputable developers. Poorly coded plugins can negatively impact your website by increasing load times, causing compatibility issues, or introducing security vulnerabilities. Always verify the credibility of the plugin source and read user reviews or developer credentials before proceeding.
Method 3: How to Install a WordPress Plugin Manually Using FTP
For more advanced users, installing WordPress plugins manually using FTP (File Transfer Protocol) offers greater flexibility, especially when dealing with large plugin files or specific server requirements.
Here’s a step-by-step guide to help you through the process:
- Ensure you have the .zip file of the plugin saved on your computer.
- Unzip the downloaded plugin file to extract its contents. You should end up with a folder containing the plugin files.
- Use an FTP client such as FileZilla to connect to your website. You will need the FTP login credentials provided by your hosting provider.
- Enter your FTP credentials (host, username, and password) into the FTP client and connect to your website.
- Once connected, go to the /wp-content/plugins/ directory on your server. This is where all your WordPress plugins are stored.
- Upload the extracted plugin folder from your computer to the /plugins/ directory on your server. This may take a few minutes depending on the size of the plugin and the speed of your connection.
- After the upload is complete, go to your WordPress dashboard, navigate to Plugins > Installed Plugins, and find the newly uploaded plugin. Click on the Activate button to enable the plugin on your site.
Important considerations! Using FTP to install plugins provides more control and can be essential for plugins that exceed the WordPress maximum file upload size. However, it requires a basic understanding of FTP clients and file management.
Method 4: How to Add a Plugin to WordPress Using cPanel
cPanel is a popular web hosting control panel provided by many hosting providers. It offers a straightforward way to manage your website, including installing WordPress plugins.
Here’s a detailed guide on how to add a plugin to WordPress using cPanel:
- Access your cPanel account using the login credentials provided by your hosting provider.
- Locate the WordPress Manager in cPanel and open it. This tool provides a list of your WordPress installations.
- Choose the WordPress site you want to add the plugin to and click on Manage Plugins.
- Click on Add Plugins to search for a plugin from the WordPress plugins directory.
- Select the plugin you want to install and click Install.
- Once installed, go to your WordPress dashboard and activate the plugin from the Plugins > Installed Plugins section.
The process of adding WordPress plugins from cPanel is quite similar to adding them from the WordPress plugins directory and provides an easy and safe choice for beginners.
Using cPanel for plugin installation provides an alternative method that can be particularly useful if you encounter issues with the WordPress dashboard. It also allows for easy management of larger plugin files and offers more control over the installation process.
Bottom Line
Learning how to install a plugin in WordPress is an essential skill for anyone managing a WordPress website.
Remember, no matter which installation method you choose, always prioritize security and performance. Ensure that the plugins you install come from reputable sources and developers. Poorly coded plugins can lead to performance issues, compatibility problems, and security vulnerabilities. Regularly review and update your plugins to keep your website running smoothly and securely.
