FLASH SALE Get 10% OFF everything using the coupon code: FLASH10 View Pricing Plans →
Child Themes are used when you want to make changes to a theme without actually changing the code or the files in your original theme. This lets you update your original theme (which is the engine behind the child theme) without losing any changes you made to your site.
If you want to make just some small changes, like adding custom CSS code, we recommend adding it in the Customizer > Additional CSS. View instructions.
Custom functions can also be added without creating a Child Theme using My Custom Functions or Pluginception plugins.
One of the most important reasons for using Child Theme is that you’ll be able to update your theme in the future without worrying that you’ll lose any of the modifications made in theme files.
Using a Child Theme, you can safely modify your parent theme as you want: edit header.php or footer.php files, add custom functions in the functions.php file, or add new theme files or page templates that will override existing ones from the parent theme.
If you are making extensive customizations – beyond styles and a few theme files – we highly recommend not updating your parent theme anymore, as this can easily break your website if you don’t sync your Child Theme with the parent theme.
All of our themes now include a 1-Click Child Theme installer, so if you’re using the latest version of the ZOOM Framework, you will find this option under Theme Options > Child Theme.
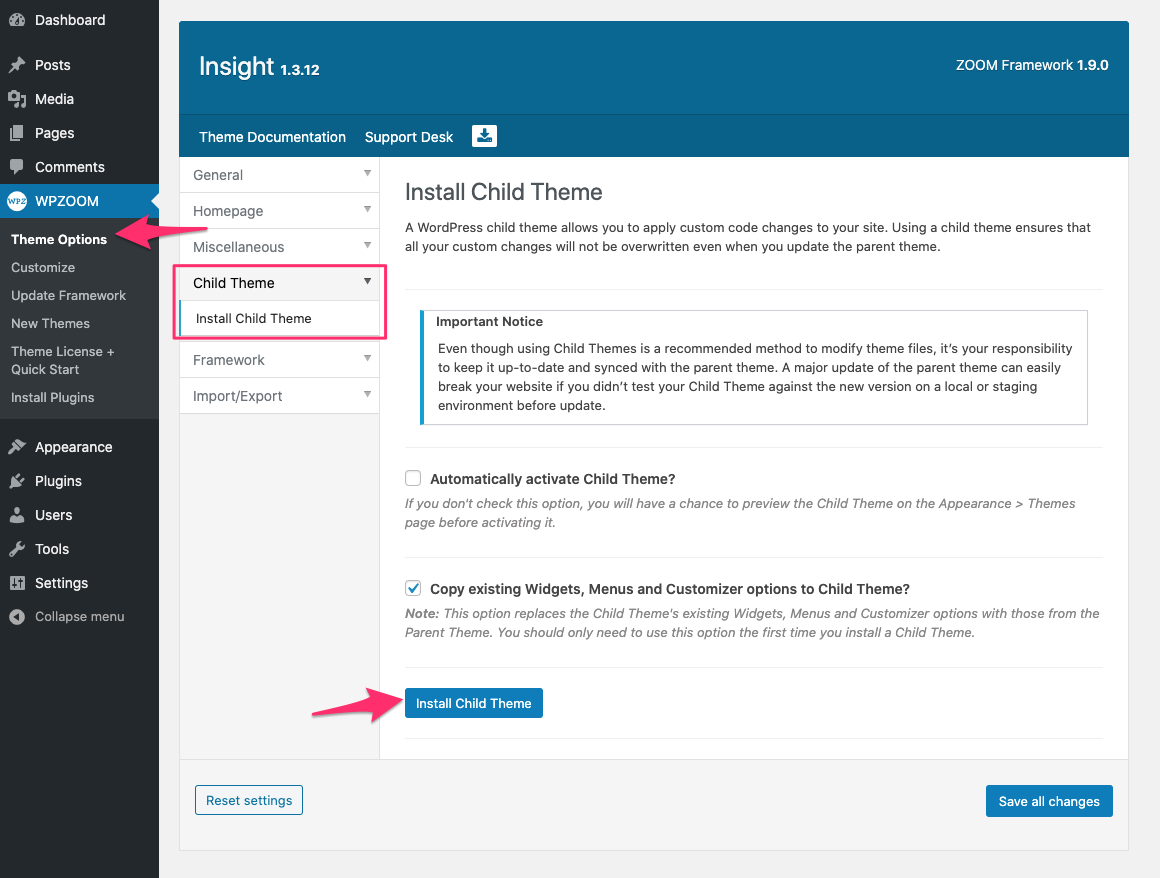
If this option is not available to you, you’ll probably have to download a new copy of the theme and re-install it. Or you can use the alternative method described below.
There are a number of plugins out there these days that will help you create a child theme. We’ve found the Child Theme Configurator plugin to work well.
1. Install the Child Theme Configurator plugin and activate it.
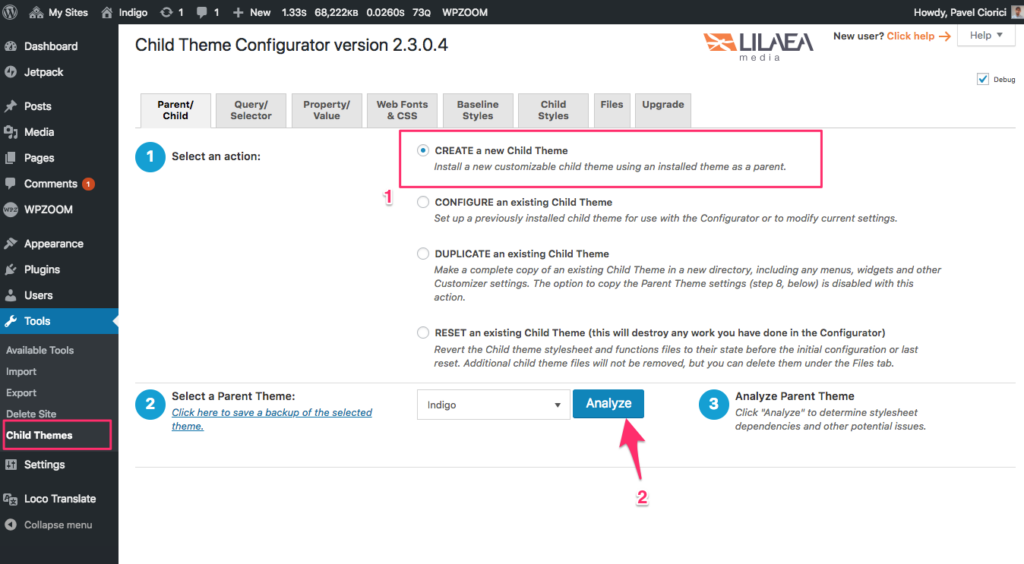
2. Go to Tools → Child Themes menu and select the option to Create a New Child Theme.
3. Select the parent theme for which you want to create a Child Theme and click the Analyze button
4. IMPORTANT: Scroll to the 6th step, “Select Parent Theme stylesheet handling,” and choose the second option: Use @import in the child theme stylesheet.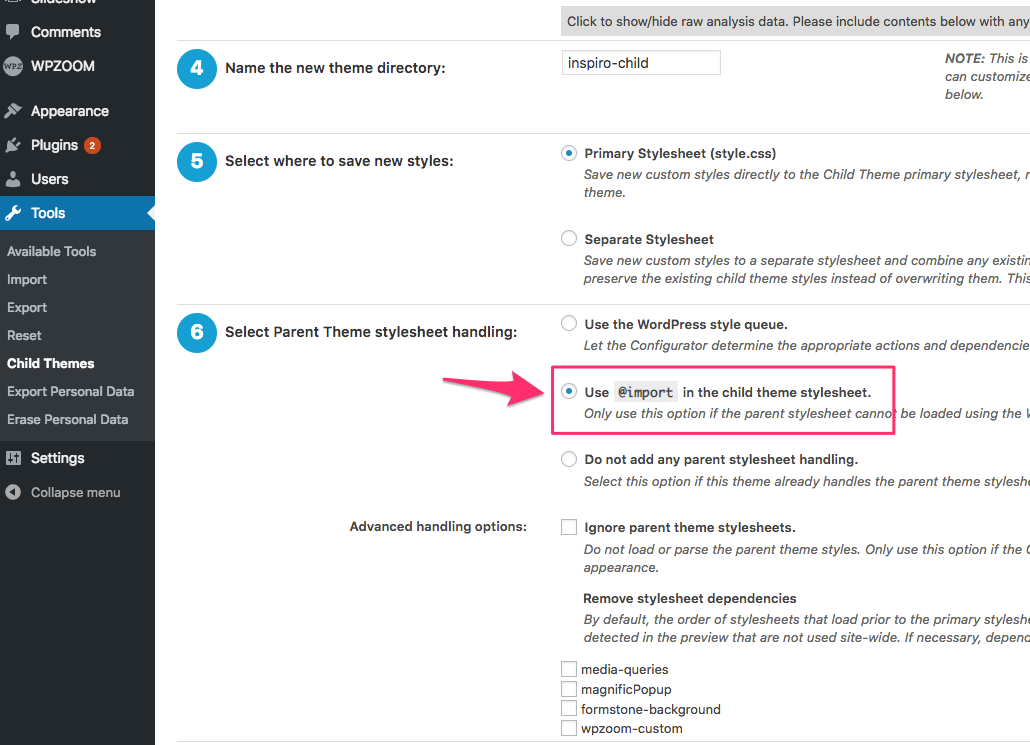
5. Scroll down to step #8, and check that option. This is useful if you already made some configurations in your current theme (widgets, menus, changes in Customizer, etc.) and you want to have these settings applied to the Child theme too.
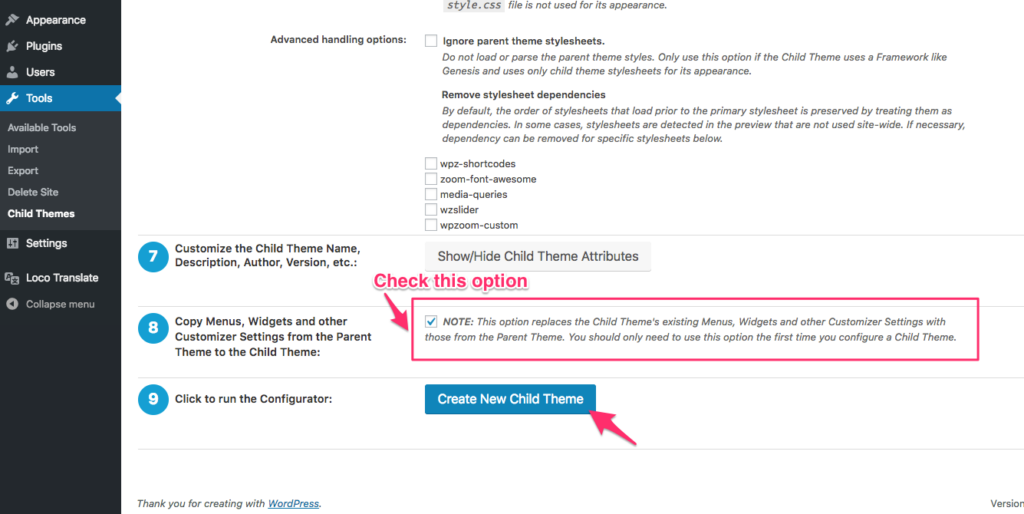
6. Click on the Create New Child Theme button.
7. Now, you can go back to the Themes pages and activate your new child theme.
Changing functions or theme files from the parent theme is easy using child themes.
Using the Child Theme Configurator plugin, you can easily copy files you want to modify from your parent to child theme. You can do that from the Files tab on the Child Themes page:
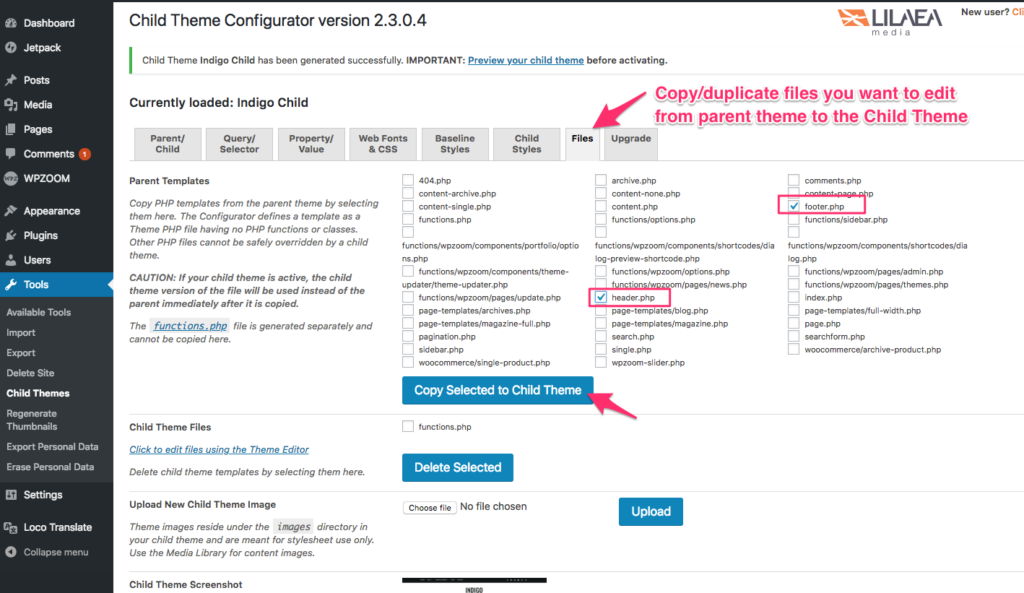
Once the files have been copied into the Child Theme, go to Appearance → Editor to edit them as you want.
You can also create new files in your Child Theme using the WPIDE plugin.
⛔️ THEME LOOKS BROKEN AFTER ACTIVATING THE CHILD THEME?
If your theme looks broken after activating the new Child Theme, please add the following code in the “functions.php” file of your Child Theme:
The file can be edited from page Appearance > Editor.
More information about Child Themes can be found here:
How to Create a WordPress Child Theme
5 Excellent Uses for a Child Theme
WordPress Codex: Child Themes